Countersunk head screws are a small-but-critical fastener used across cabinetry, furniture, metalwork, automotive trim, and many other fields. This deep-dive explains how they work, when to use them, how to install and remove them properly, and how to choose the right material, finish, and size for your project. It also shows how to salvage a stripped fastener using a reliable screw extractor.
Why Countersunk Head Screws Matter
At first glance, a countersunk screw looks like a tiny detail — but it’s a design decision with practical consequences. The flush head eliminates protrusions that can catch clothing, reduce friction in moving assemblies, and produce a cleaner visual finish for painted or varnished surfaces. In engineering terms, a countersunk head helps transfer shear and compressive loads more evenly across the material layers when installed correctly.

Screw Anatomy — What Makes a Countersunk Screw
Every countersunk screw has the same basic parts: head, drive, shank, thread, and tip. What distinguishes it is the head profile — a conical underside that matches a countersunk hole in the substrate. Typical head angles are standardized so that screw heads seat predictably in corresponding countersink bits and tooling.
| Part | Function | Notes |
|---|---|---|
| Head (flat top) | Sits flush with the surface | May be finish-painted or filled |
| Drive | Accepts driver bit (Phillips, Torx, slotted) | Choose the drive for the best torque control |
| Shank | Main shaft — may be partially threaded | Shank design affects shear strength |
| Thread | Grips the material | Coarse threads for wood, fine for metal |
| Tip | Starts insertion | Self-drilling/self-tapping vs blunt |
Head Angles & Standards — 82°, 90°, 100° and Why They Matter
Standards exist so a screw head sits predictably in a countersunk hole. The most widely used head angles:
- 82° — common in North American ANSI/ASME standards for machine screws and wood screws.
- 90° — common for metric screws and many European standards (ISO/DIN).
- 100° — used less commonly, sometimes for specific thin-sheet applications where a wider bearing surface is needed.
When choosing countersink bits and drivers, match the head angle for best cosmetic and functional results.
Materials & Finishes — Choosing the Right Countersunk Screw Material
Your project environment determines material choice. Below is a short guide.
| Material | Strength & Corrosion | Best Uses |
|---|---|---|
| Carbon steel (zinc plated) | Strong, economical; zinc resists rust moderately | Indoor construction, furniture |
| Stainless steel (304 / 316) | Excellent corrosion resistance | Outdoor, marine, bathrooms |
| Brass | Moderate strength; great corrosion resistance & aesthetics | Decorative fixtures, antiques |
| Alloy / Grade-specific steels | High tensile strength | Machine and automotive applications |
| Nylon / Plastic | Non-conductive, corrosion-free, low-strength | Electronics, light fixtures |
Finishes include black oxide, hot-dip galvanize, zinc, nickel, and special coatings (e.g., PTFE). Choose a finish for appearance and corrosion resistance appropriate to the environment.
Popular Types & Drive Styles — Phillips, Torx, Hex, Square, Slotted
Drive choice affects torque transfer and the likelihood of stripping the screw head:
- Phillips (cross-head) — common and cheap, moderate torque; cam-out is built-in to avoid overtightening.
- Torx (star) — excellent torque transfer, lower strip risk, favored in electronics & automotive.
- Hex / Socket — high torque capability; common in machinery.
- Slotted — traditional; poor torque control and prone to slipping.
For countersunk screws, Phillips and Torx drives are most common. Torx is preferred where repeatable high torque is required (e.g., cabinetry, mechanical assemblies).

Applications by Industry — Where Countersunk Screws Shine
Woodworking & Furniture
Countersunk screws give cabinets and trim a seamless look. They allow the screw head to be concealed with filler or plugs, important for high-end furniture.
Construction & Drywall
Used where flush surfaces are necessary before plaster, paint, or finishing trim. They reduce the risk of snagged drywall or torn finishes.
Automotive & Marine
Where aerodynamics and appearance matter, flush mounting is essential; stainless countersunk fasteners are common here.
Electronics & Appliances
Compact enclosures use countersunk screws to maximize internal space while maintaining exterior smoothness.
Installation: Tools, Steps & Common Mistakes
Tools you'll need
- Countersink drill bit set (match head angle)
- Pilot drill bits (size per screw diameter)
- Screwdriver or torque-limited driver (Phillips/Torx)
- Tape measure, clamp, center punch
Step-by-step installation
- Measure & mark the location precisely. Use a center punch on wood/metal to prevent walking.
- Drill the pilot hole sized to the screw's minor diameter (the shaft between threads).
- Countersink to the correct depth and angle — check that the screw head sits flush or just below the surface.
- Drive the screw at a steady speed; avoid aggressive impacts, which can fracture the surrounding material.
- Finish with filler, plug, or paint if you need a perfectly smooth surface.
Common mistakes & how to avoid them
- Drilling too large a pilot hole → the screw won’t bite properly. Use manufacturer charts.
- Insufficient countersink depth → head will protrude. Re-check depth with a test screw.
- Over-torquing → strips the driver or breaks the screw. Use torque-limited tools or a clutch on drills.
- Wrong drive type → cam-out or strip. For high torque use Torx or hex drives.
Torque Guidance & Mechanical Considerations
Torque values depend on screw diameter, material, thread type, and substrate. Below is a general table (approximate) useful for hand and power tool settings. Always consult the manufacturer's data for precise values.
| Screw Size | Suggested Final Torque (N·m) | Notes |
|---|---|---|
| M3 / #4 | 0.5 - 1.0 | Small electronics; low torque |
| M4 / #6 | 1.5 - 2.5 | Light fixtures, small panels |
| M5 / #8 | 3 - 5 | Furniture, medium load |
| M6 / 1/4" | 6 - 9 | Heavy furniture, structural attachments |
Using a torque-limited driver prevents over-compressing soft materials and avoids stripping driver bits. In metal assemblies where clamping load is critical, torque specs are part of engineering documentation.
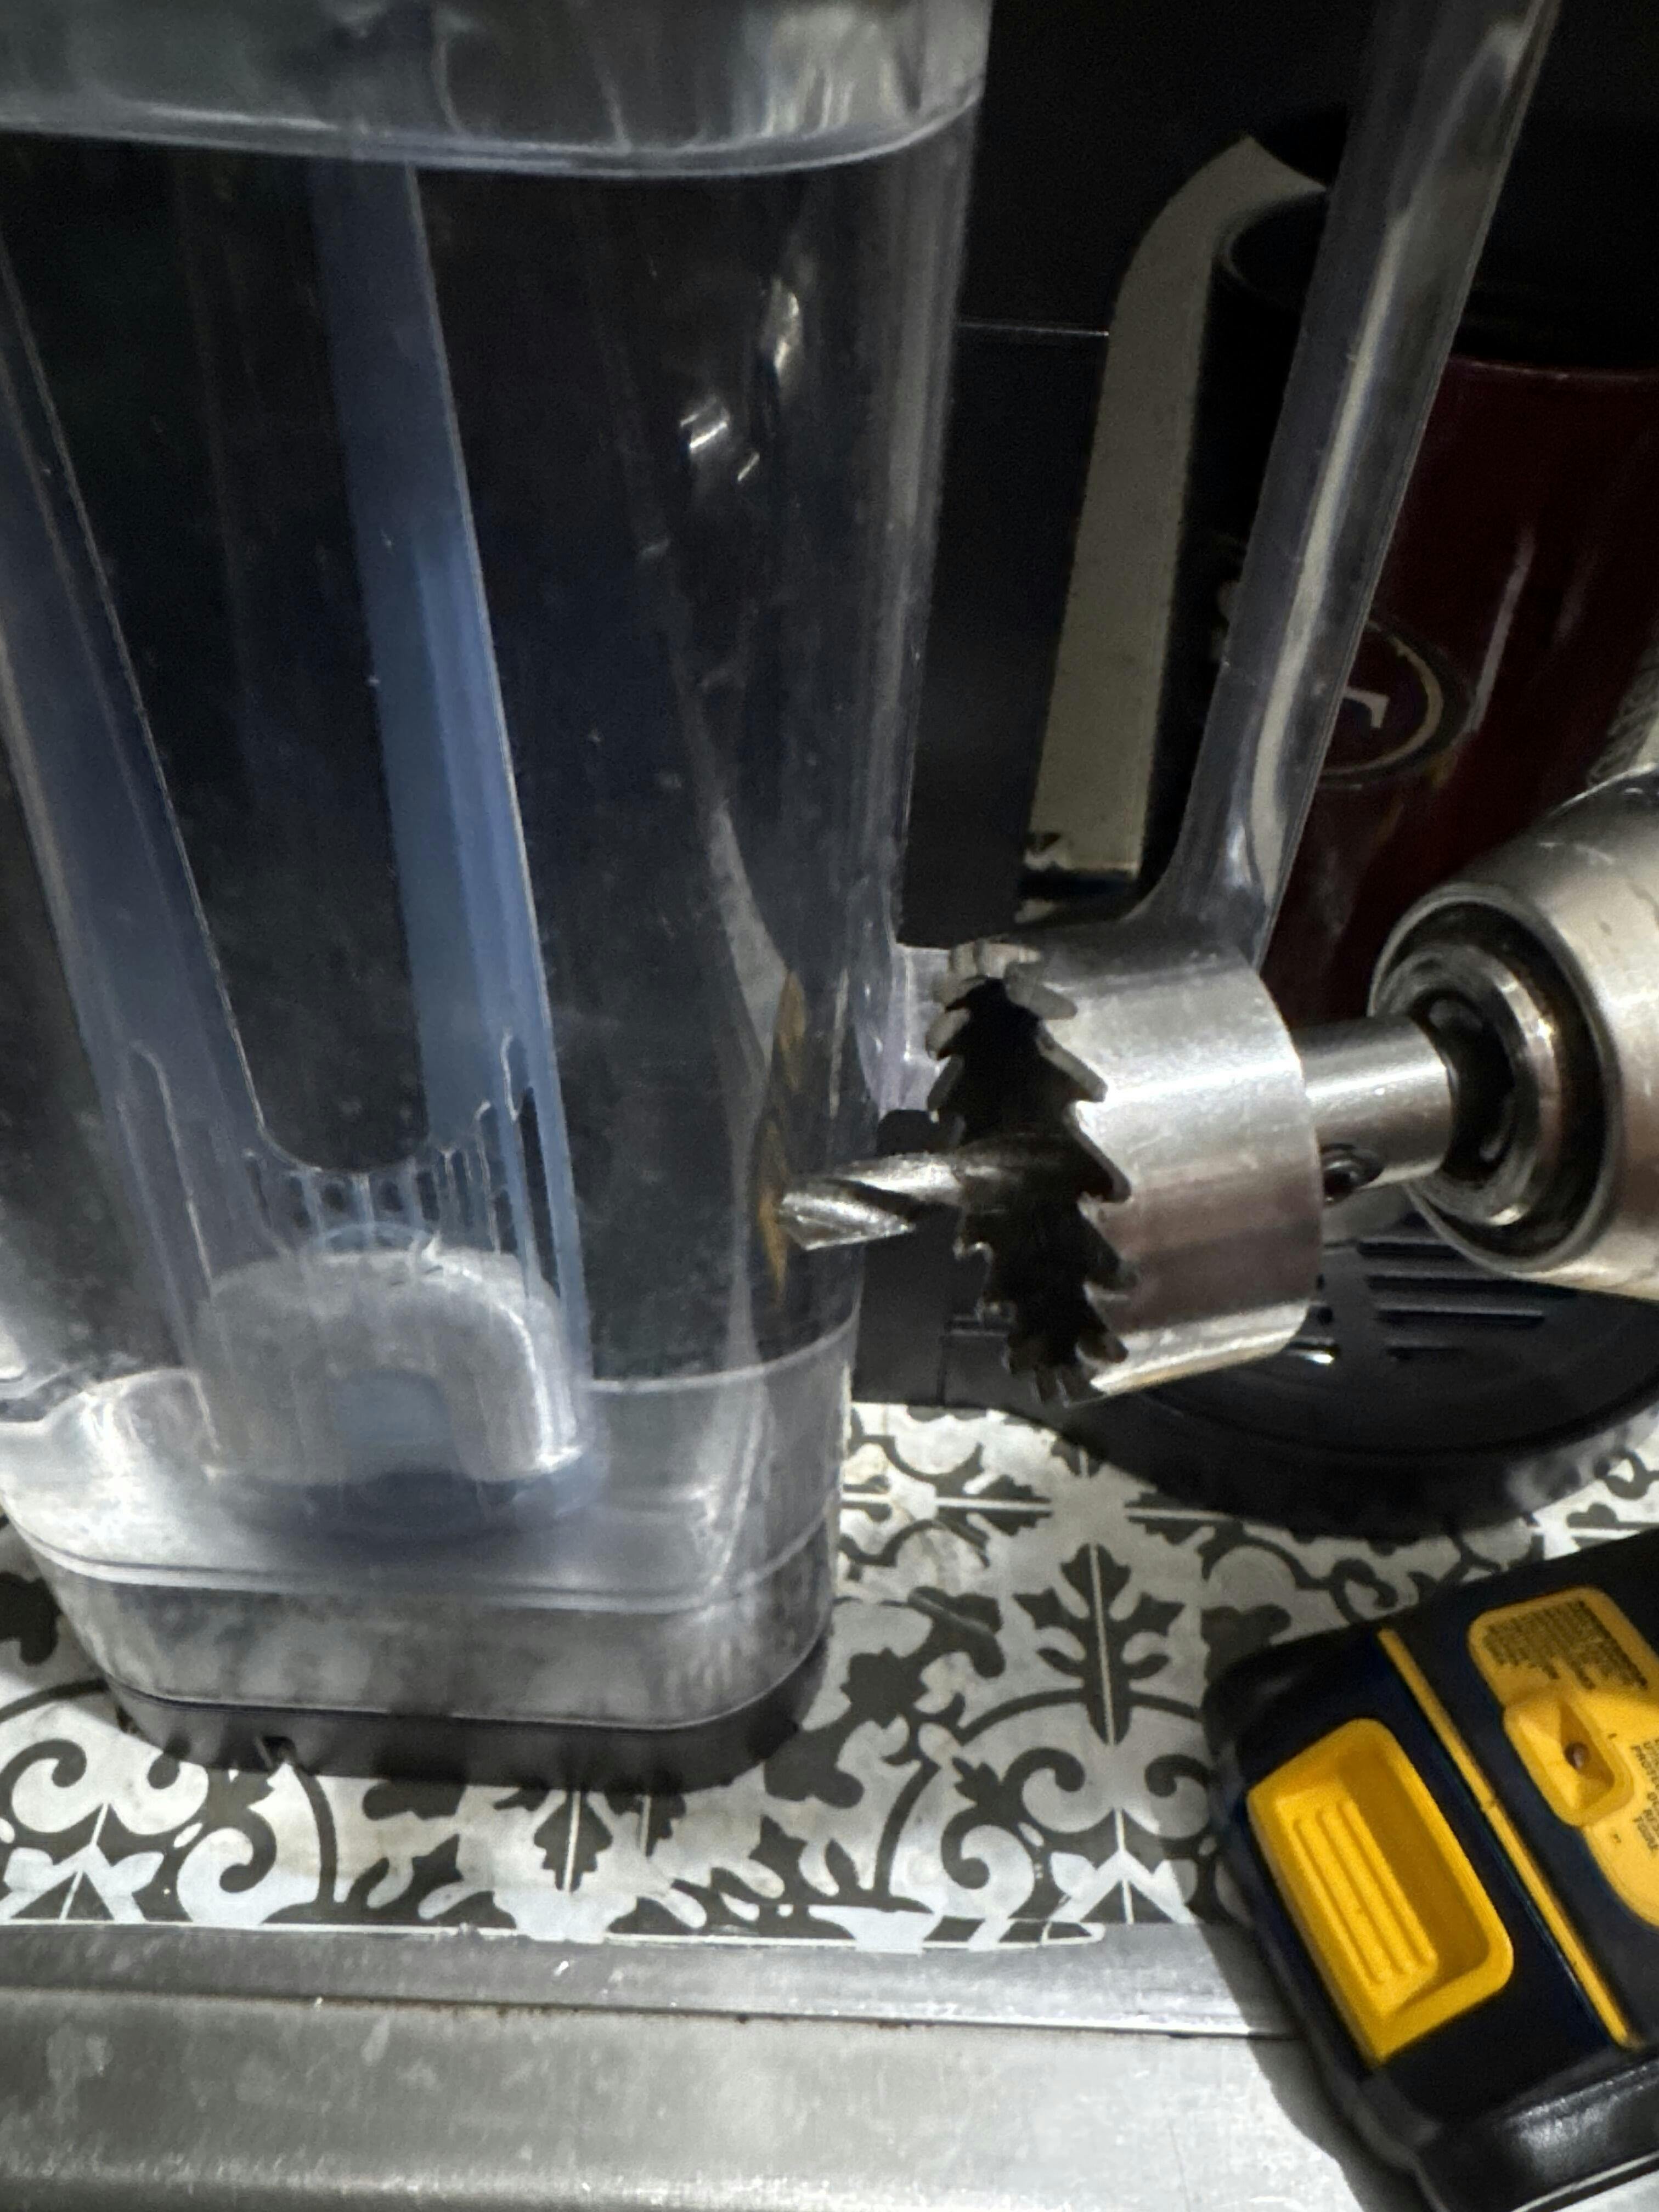
How to Remove a Damaged Countersunk Screw — Step-by-Step with a Screw Extractor
Even with care, screw heads can strip or corrode. A screw extractor is a dedicated tool for this situation. Use a quality extractor set and follow these steps:
- Clear the work area and wear safety glasses.
- Use a center punch to mark the exact center of the damaged screw (this reduces drill walking).
- Drill a pilot hole with a small HSS bit appropriate for the extractor size. Keep the speed moderate and apply cutting oil for metal.
- Insert the extractor into the pilot hole — many extractors are left-threaded, so they bite when turned counterclockwise.
- Apply steady, controlled torque with a T-handle or wrench until the screw backs out.
- If the extractor slips or starts to fracture, stop and escalate to a larger extractor or to drilling out the screw completely and re-tapping the hole.
Important: If the screw is rusted in place, apply penetrating oil and allow time to soak (hours or overnight) before attempting extraction.
Our shop-stock kit (linked in this article) contains a multi-size extractor set that works well for countersunk fasteners in many materials.
Countersunk vs Other Head Types — Quick Comparison
| Head Type | Profile | Best For | Looks |
|---|---|---|---|
| Countersunk | Flush | Furniture, panels, trim | Discrete, finished |
| Pan Head | Raised | Machine fastening, electronics | Visible |
| Round Head | Domed | Decorative uses | Decorative |
| Hex Head | Bolt-like | Heavy assembly requiring high torque | Functional |
Buying Guide & Size Chart — How to Choose the Right Countersunk Screw
Consider these parameters:
- Diameter & length — long enough to engage good thread depth but not long enough to protrude.
- Material & finish — stainless for outdoors, zinc or black oxide for indoor use.
- Drive type — Torx for higher torque, Phillips for general-purpose.
- Head angle — match your countersink bit and application (82° vs 90°).
| Typical Project | Recommended Screw | Why |
|---|---|---|
| Indoor cabinet assembly | M4-M5 stainless countersunk, Phillips/Torx | Flush finish and corrosion resistance |
| Outdoor deck trim | M6 stainless countersunk, Torx, coated | High strength & corrosion resistance |
| Sheet metal panels | Self-tapping countersunk, fine thread | No pre-tap needed; flush finish |
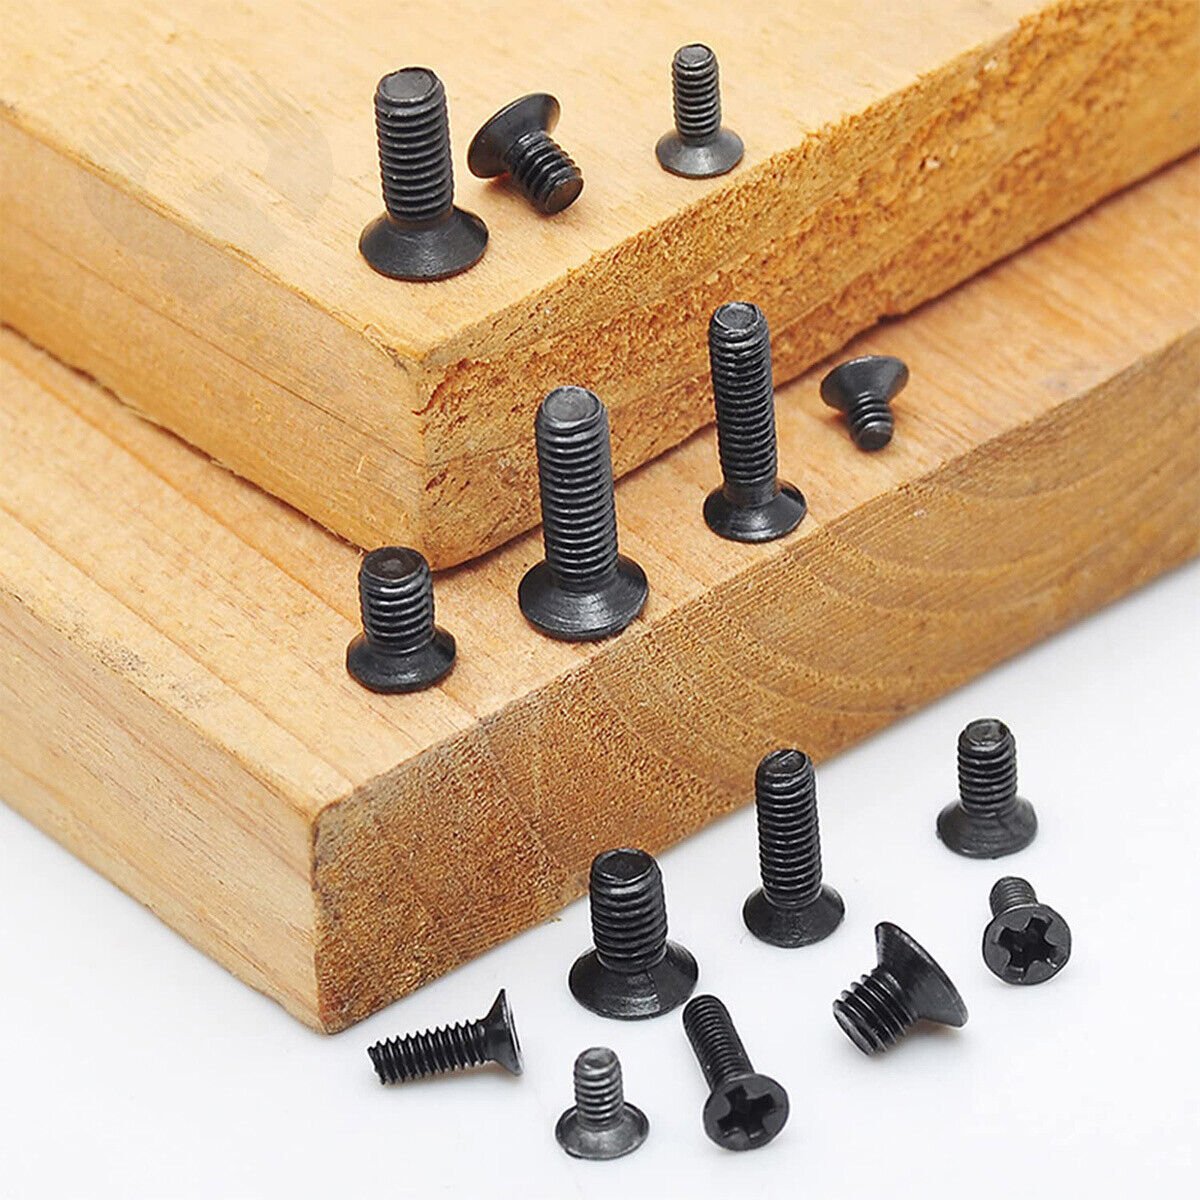
Our recommended set is the 300PCS Black Cross Head Countersunk Screw Set, which contains a variety of common sizes and a durable black finish for interior projects.
Longevity, Corrosion & Maintenance
To make fasteners last:
- Use the right material & finish for the environment.
- Apply anti-seize to stainless steel in high-temperature or galvanic potential situations.
- Store screws in dry containers with desiccant packs to reduce early corrosion.
- During installation, use consistent torque to avoid stressed threads.
Case Studies & Real-World Examples
Case Study — Mid-range Cabinet Shop
A furniture shop replaced visible finish nails with countersunk screws in rail assemblies. They counterbored the head position and used dowel plugs to hide the heads after the glue cured. The result: stronger joints and a smoother finish that held paint better over time.
Case Study — Small Marine Repair
A boat owner swapped rust-prone fasteners for 316 stainless countersunk screws when replacing trim. The flush heads and corrosion resistance eliminated frequent touchups and made the boat safer and more presentable.

FAQ — Top 5 Questions About Countersunk Screws
Q1: What angle should I use — 82° or 90°?
A: Match the screw to the countersink bit and the regional standard. For general North American machine screws, 82° is common; metric systems often use 90°.
Q2: Can I reuse countersunk screws?
A: Yes, provided the threads and head are intact and there’s no corrosion or deformation. Using the same screw in a new hole in soft wood is not recommended due to thread wear.
Q3: My countersunk screw head stripped — can I remove it?
A: Yes. Use a screw extractor or left-hand drill bit with appropriate safety measures. If the extractor breaks, professional drilling may be necessary.
Q4: Do countersunk screws weaken the material?
A: If installed correctly (proper pilot hole, correct depth) they do not significantly weaken the substrate. Incorrectly sized pilot holes or over-torquing can reduce strength.
, Q5: What drive should I choose to minimize cam-out?
A: Torx or hex socket drives minimize cam-out and allow higher applied torque with less risk of stripping. Phillips can be fine for lighter-duty home tasks.
Conclusion & Next Steps
Choosing the right countersunk head screw blends aesthetics, mechanical logic, and material selection. For most home and workshop projects, an all-purpose stainless or zinc-plated countersunk set with Phillips or Torx drive will cover the bases. Keep a quality extractor set on hand for damaged fasteners — it will save time and material in repairs.
If you want a reliable kit for everyday projects, consider the 300PCS Black Cross Head Countersunk Screw Set available at HomeDIYer. It's a practical, versatile choice for pros and DIYers — stocked with commonly used sizes and a pleasing finish.
Would you like printable step-by-step installation cards, torque charts for your kit, or a visual infographic to add to the article? I can create those as images or downloadable PDFs to increase engagement and conversions—just tell me which you'd prefer.