

(Table of Contents)
-
Why Thread Size Matters (More Than You Think!)
-
Gear Up: Tools You'll Need
-
Method 1: The Caliper Measurement (Precision Approach)
-
Method 2: The Thread Pitch Gauge (The Classic Tool)
-
Method 3: The Nut & Bolt Thread Checker (The Fast & Foolproof Lifesaver)
-
Method 4: The "Matching" Game (Using a Known Nut or Bolt)
-
Method 5: The Ruler & Eyeball Method (Rough & Ready - Use Caution!)
-
Cracking the Code: Understanding Thread Designations (Metric & Imperial)
-
Beyond Size & Pitch: Thread Type (UNC, UNF, Metric Fine, etc.)
-
Pro Tips & Common Pitfalls to Avoid
-
Conclusion: Choose Your Method, Conquer Your Project!
-
FAQs: Your Thread Sizing Questions Answered
1. Why Thread Size Matters (More Than You Think!)
Let's be honest: most of us have been there. You're halfway through assembling that new shelf, repairing the lawnmower deck, or fixing a beloved piece of furniture. You reach for a bolt... and crunch. It almost fits, but it feels gritty. You try to force it (we've all done it!), and suddenly, that threaded hole in your expensive part is mangled beyond repair. That sinking feeling? It's often the direct result of not knowing the exact thread size.
Using a bolt with the wrong diameter is like trying to fit a square peg in a round hole – it simply won't go, or it will destroy the threads trying. Using one with the wrong pitch (the number of threads per inch or the distance between them) is even sneakier. It might start threading in smoothly, lulling you into a false sense of security, only to bind up catastrophically halfway down. This "cross-threading" creates irreparable damage.
Getting thread size right is non-negotiable for:
-
Safety: Critical assemblies (bike components, automotive parts, structural elements) rely on properly sized fasteners for their strength. A mismatched bolt is a weak point waiting to fail.
-
Functionality: Properly matched threads ensure smooth assembly/disassembly and create a tight, secure, and vibration-resistant connection. Nothing rattles loose.
-
Preventing Damage: Forcing the wrong thread size is the fastest way to ruin expensive components or the fasteners themselves. Stripped threads mean drilling, tapping, or replacing parts – costly and time-consuming headaches.
-
Saving Time & Frustration: Knowing the exact size means grabbing the right nut or bolt the first time, every time. No more rummaging through jars of mystery hardware or making multiple trips to the store.
Think of thread size as the DNA of your fastener. Identifying it correctly is step zero for any successful project involving nuts and bolts. Let's figure out how to crack that code.
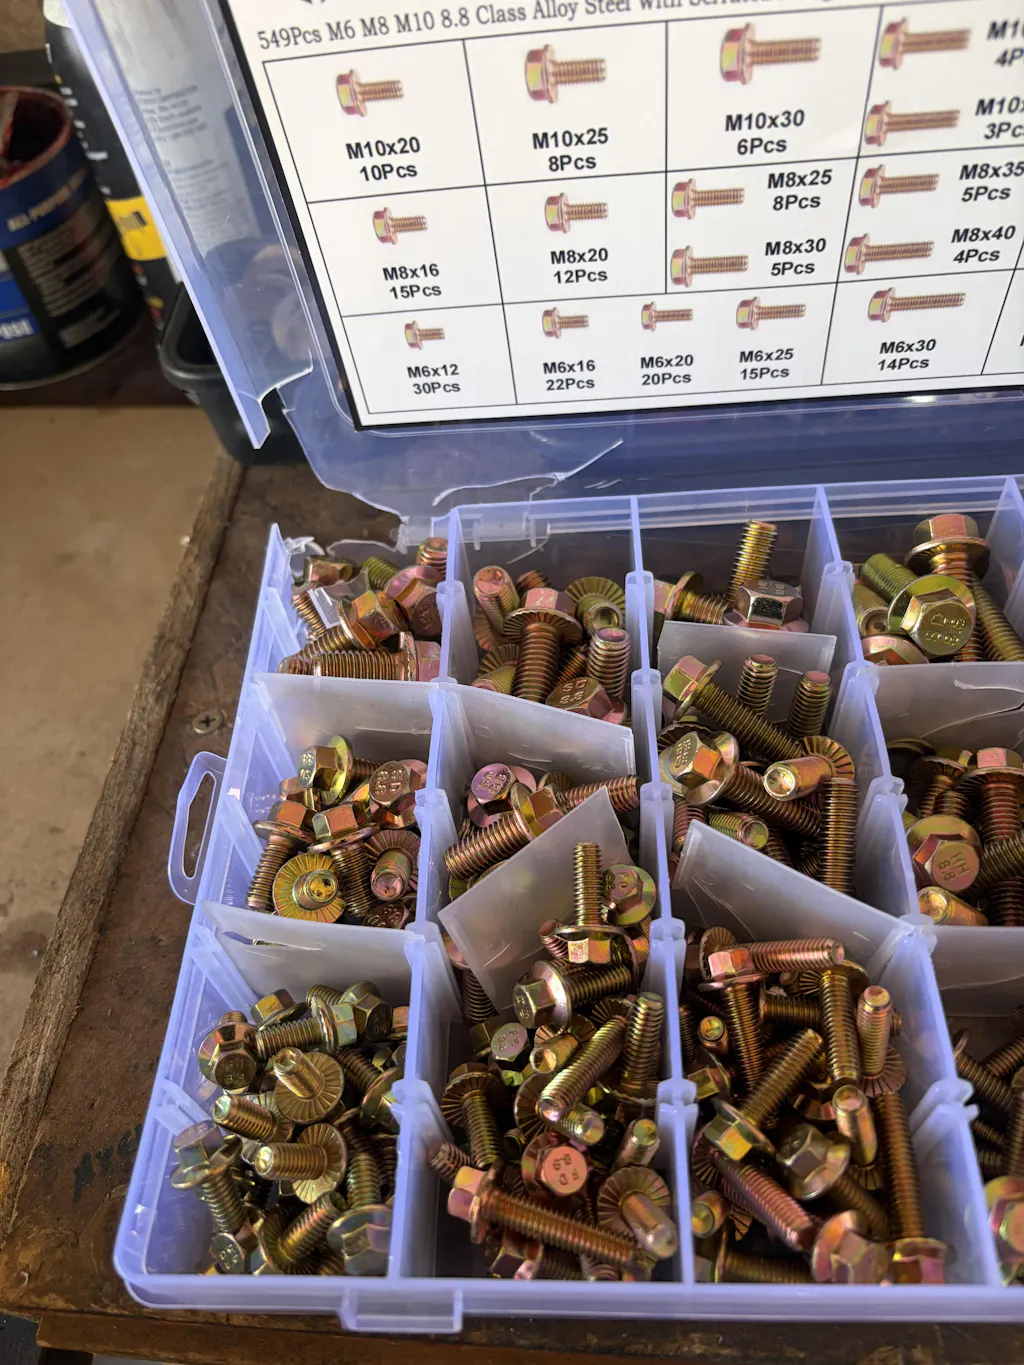
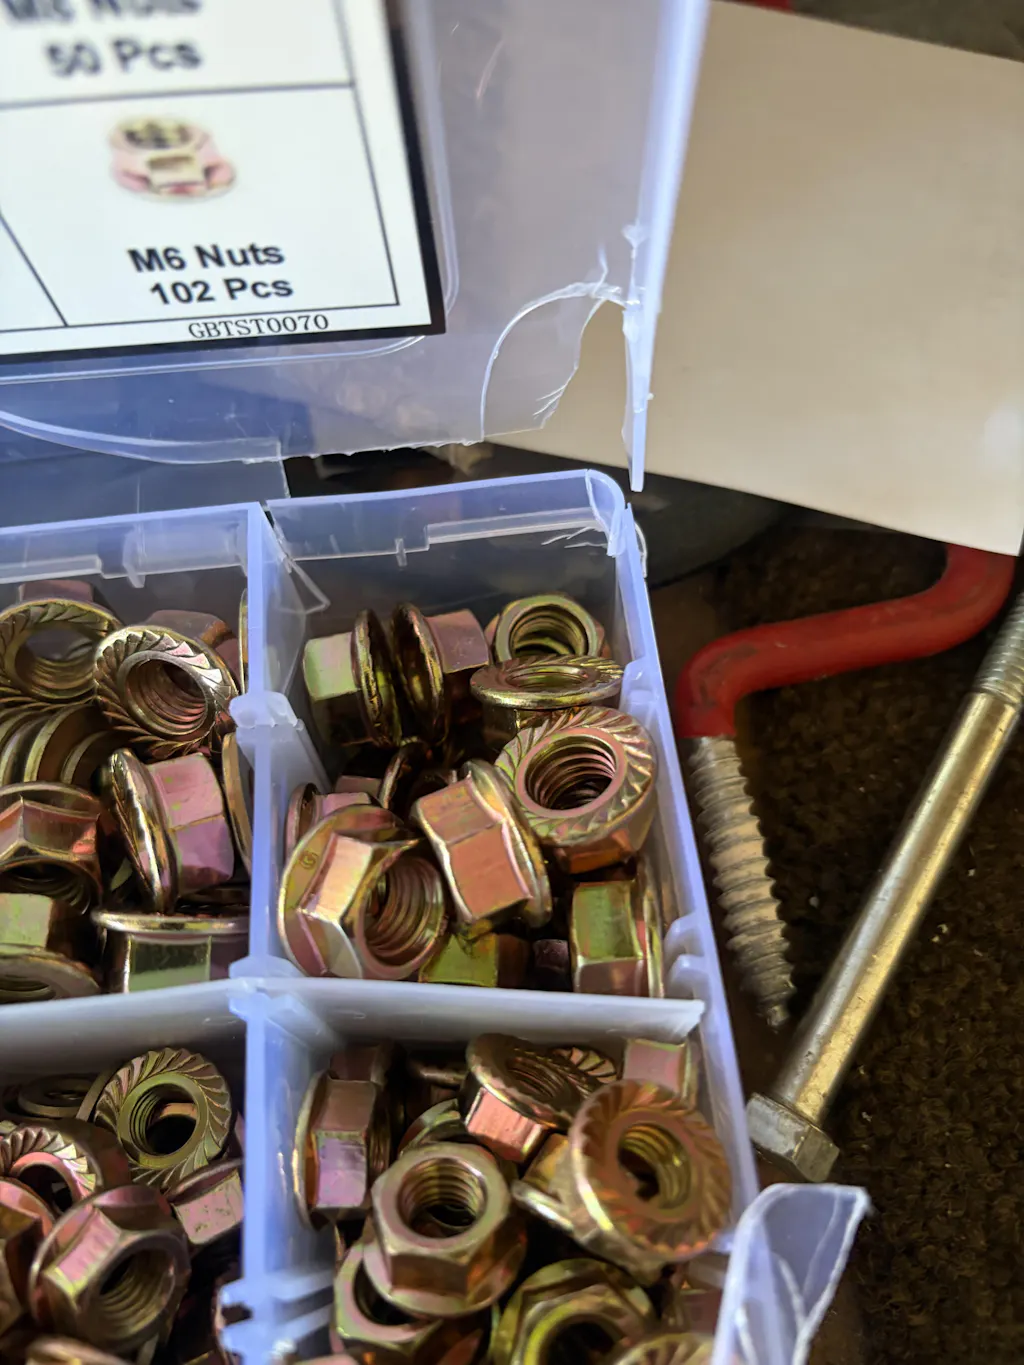
2. Gear Up: Tools You'll Need 🧰
Before diving into the methods, let's talk about tools. You don't necessarily need everything listed here for every job, but having the right ones makes identification far easier and more accurate:
-
Digital or Dial Calipers: The workhorse of precision measurement. Essential for accurately measuring bolt diameter and sometimes thread length. A 6-inch (150mm) caliper is versatile for most common fasteners. Highly Recommended.
-
Thread Pitch Gauge: Looks like a set of feeler gauges or saw teeth. Each blade has teeth cut to match a specific thread pitch. You "try" different blades against the bolt threads until you find the perfect match. Crucial for identifying pitch independently. Highly Recommended.
-
Nut & Bolt Thread Checker (Like the HomeDIYer Gauge): This is your ultimate shortcut tool. It's a compact plate or set of inserts with dozens of precisely cut threaded holes (female) and posts (male) representing the most common metric and imperial thread sizes. You simply try screwing your bolt into the holes or your nut onto the posts until you find the perfect fit. Instant identification! (We might be biased, but it's genuinely the fastest, most reliable method for DIYers – check ours out!)
-
Good Quality Steel Ruler or Tape Measure: Useful for rough measurements of length and sometimes approximate diameter (though calipers are far superior). Necessary for the ruler method if calipers aren't available.
-
Magnifying Glass or Loupe: Threads can be small! A little magnification helps immensely in seeing thread details clearly, checking for damage, or reading tiny markings on the bolt head.
-
Marker & Paper: For jotting down measurements as you take them.
Pro Tip: Keep your tools clean! Dust, grease, or metal shavings on your caliper jaws or thread gauge teeth will throw off your measurements. A quick wipe with a clean cloth before use makes a big difference.
3. Method 1: The Caliper Measurement (Precision Approach) 📏
This is the fundamental method, often used in conjunction with a thread pitch gauge. It requires focus but delivers solid results.
Step 1: Measure the Major Diameter (Bolt) or Inside Diameter (Nut)
-
For a BOLT: Carefully measure the outer diameter (O.D.) of the threaded portion. This is called the Major Diameter. Position the caliper jaws squarely across the threads, avoiding any damaged sections at the very start or end. Close the jaws gently until they just grip the threads without crushing them. Take the measurement. Record it precisely (e.g., 0.248 inches, 6.02 mm).
-
For a NUT: Carefully measure the inner diameter (I.D.) of the threaded hole. This is the Minor Diameter of the bolt it's designed to fit. Insert the caliper's smaller jaws (or the tips) gently into the hole and expand them until they just contact the threads. Record this measurement.
Step 2: Measure the Thread Pitch
-
Using a Thread Pitch Gauge: This is the most accurate way. Select the side of the gauge designed for the system you suspect (Metric or Imperial). Fan out the blades. Starting with likely candidates based on your diameter measurement, gently press the teeth of a blade against the bolt's threads. The correct pitch blade will fit perfectly: the teeth will mesh seamlessly with the bolt's threads without any gap or forcing. There should be no rocking or looseness. It should feel like a key sliding into its lock. Note the pitch value marked on that blade (e.g., 1.25mm, 20 TPI - Threads Per Inch).
-
(Image Suggestion: Close-up photo showing a thread pitch gauge blade perfectly meshing with bolt threads vs. one that doesn't fit).
-
-
Using the Ruler Method (Less Accurate): Measure the length of the threaded portion in inches or millimeters. Count the number of complete thread peaks (crests) within that length. For Imperial (TPI): Divide the number of threads by the length in inches. E.g., 20 threads in 1 inch = 20 TPI. For Metric (Pitch): Divide the length in millimeters by the number of threads to get the distance between threads (pitch). E.g., 20 threads in 25mm = 1.25mm pitch. This method is prone to error, especially on short lengths.
Step 3: Identify the Standard & Designation
-
Metric: Diameter (in mm) + Pitch (in mm). E.g., M8 x 1.25 (Major Diameter approx. 8mm, Pitch 1.25mm).
-
Imperial (Unified - UNC/UNF): Diameter (in inches - often fractional) + Threads Per Inch (TPI). E.g., 1/4"-20 UNC (Major Diameter 0.250", 20 Threads Per Inch, Coarse thread).
Pros: Very precise when done carefully. Only requires calipers and a pitch gauge (common tools).
Cons: Requires two separate tools. Takes practice to get consistent, accurate caliper readings on threads. The ruler method for pitch is unreliable. Doesn't directly confirm thread type (e.g., UNC vs UNF).
4. Method 2: The Thread Pitch Gauge (The Classic Tool) 🔍
While often used with calipers (as described in Method 1), a thread pitch gauge can sometimes give a strong clue on its own, especially if you have a good idea of the bolt's size category.
-
Focus on Pitch: Follow the pitch measurement steps outlined in Method 1. Find the perfect matching blade.
-
Narrow Down Diameter: Knowing the pitch significantly narrows down the possible diameters. For example, a bolt with 20 TPI could be 1/4"-20, 5/16"-20 (less common coarse), or possibly a fine thread like 3/8"-24 (but the gauge would tell you it's 24 TPI, not 20). You still need to measure the diameter to confirm.
-
Limitation: It only tells you the pitch. You must combine it with a diameter measurement (caliper or thread checker) for complete identification.
Pros: Essential for accurate pitch measurement. Relatively inexpensive.
Cons: Only gives half the answer (pitch). Requires pairing with another tool for diameter. Can be fiddly with small or damaged threads.
5. Method 3: The Nut & Bolt Thread Checker (The Fast & Foolproof Lifesaver) ⚡
This is where the magic happens for efficiency and certainty, especially for DIYers dealing with a wide range of common fasteners. A quality thread checker like the HomeDIYer Nut & Bolt Thread Checker is purpose-built for this exact task.
How it Works (It's Beautifully Simple):
-
Identify if you have a Bolt (Male Threads) or a Nut (Female Threads).
-
For a BOLT:
-
Locate the section of the gauge with threaded holes (female threads). These are usually clearly marked (Metric Coarse, Metric Fine, UNC, UNF, etc.).
-
Start trying to screw your bolt into the holes. Begin with holes close to its estimated size (you can eyeball this roughly).
-
The correct size hole will allow the bolt to screw in smoothly by hand for several turns. It should feel like threading into a properly sized nut – no forcing, no wobble, no tightness beyond initial thread engagement. It won't go into a hole that's too small or too large (in pitch or diameter).
-
-
For a NUT:
-
Locate the section of the gauge with threaded posts (male threads).
-
Start trying to screw your nut onto the posts. Again, start near the estimated size.
-
The correct size post will allow the nut to screw on smoothly by hand for several turns. Again, it should feel natural and secure.
-
-
Read the Label: Once you find the perfect fit, the hole or post will be clearly labeled with the full thread designation (e.g., M6-1.0, 1/4"-20 UNC, 5/16"-24 UNF). That's it! You have your diameter, pitch, and thread type instantly.
Why DIYers Love This Method:
-
Speed: Dramatically faster than measuring and cross-referencing. Identify dozens of fasteners in minutes.
-
Simplicity: No interpretation needed. No math. Just screw it in. Anyone can do it.
-
Certainty: Directly tests the functional fit – the ultimate test of thread compatibility. Eliminates measurement errors. Confirms both diameter AND pitch AND thread type simultaneously.
-
Portability: Fits in a toolbox or drawer. Take it to the junkyard, the hardware store aisle, or your friend's garage.
-
Organization: Great for sorting and labeling those jars of mystery hardware!
Pros: Blazing fast. Extremely reliable. Confirms functional fit and thread type. Easy for anyone. Reduces errors.
Cons: Requires purchasing the gauge (though a very worthwhile investment!). Limited to the specific sizes included on the gauge (a good one covers the vast majority of common DIY sizes).
(Image Suggestion: Short video/GIF showing a bolt being effortlessly screwed into the correct hole on the HomeDIYer Thread Checker, then showing the clear label).
6. Method 4: The "Matching" Game (Using a Known Nut or Bolt) 🔄
If you have a known good nut that fits the bolt (or vice versa), you can use it as your reference tool.
-
Find a Known Match: This could be:
-
The nut that was originally on the bolt.
-
Another bolt that screws perfectly into the nut.
-
A fastener from the same assembly (e.g., another bolt holding the same part).
-
-
Identify the Known Fastener: Use one of the previous methods (Caliper/Pitch Gauge or Thread Checker) to determine the size of the known nut or bolt.
-
Apply the Size: The fastener you're trying to identify is the same size as the one you just measured! A bolt that perfectly fits a 1/4"-20 nut is a 1/4"-20 bolt.
Pros: Simple if you have a known match handy. Confirms functional fit.
Cons: Relies entirely on having that known part available and correctly identified. Doesn't work if the matching part is lost or also unknown.
7. Method 5: The Ruler & Eyeball Method (Rough & Ready - Use Caution!) ⚠️
This is the method of last resort, when no tools are available. Accuracy is low, and the risk of error (and subsequent damage) is high. Use only for non-critical applications where an approximate size is acceptable, or to get a very rough idea before using a proper tool.
-
Estimate Diameter:
-
Hold the bolt shank against a ruler with inch and metric markings.
-
Compare its thickness to the markings. E.g., "Looks a bit bigger than 1/4 inch, maybe 5/16? Looks close to 8mm?"
-
-
Estimate Pitch (TPI - Imperial Focused):
-
Hold the ruler against the bolt's threads.
-
Count how many thread peaks fit within 1 inch. This is very hard to do accurately! If you count roughly 10 peaks in 1/2 inch, that would be ~20 TPI.
-
-
Guess the Designation: Combine your rough estimates. E.g., "Maybe 5/16 inch... and maybe 18 TPI? So possibly 5/16"-18?" This is highly speculative.
Significant Limitations:
-
Human error in eyeballing diameter against a ruler is high.
-
Counting threads per inch accurately without magnification or a defined start/stop point is extremely difficult.
-
Doesn't distinguish between similar sizes (e.g., M6 vs 1/4", which are close but NOT compatible).
-
Provides no information on thread type (UNC/UNF/Metric Fine).
-
High risk of selecting the wrong fastener, leading to cross-threading or failure.
Pros: Only requires a ruler. Fast (but often wrong).
Cons: Highly inaccurate. High risk of project failure or damage. Should only be used for very rough estimation before employing a proper method.
8. Cracking the Code: Understanding Thread Designations (Metric & Imperial) 🧩
Once you have your measurements or find the perfect fit on a thread checker, you'll encounter standard designations. Here's how to read them:
-
Metric (e.g., M8 x 1.25):
-
M: Stands for "Metric" thread. -
8: The nominal major diameter in millimeters (approx. 8mm). Actual measured diameter will be very slightly less (e.g., 7.92mm). -
x 1.25: The pitch - the distance between adjacent threads in millimeters (1.25mm). If onlyM8is written, it usually refers to the standard coarse pitch for that size (for M8, that's 1.25mm). Fine pitch is explicitly stated (e.g., M8 x 1.0, M8 x 0.75).
-
-
Imperial Unified (e.g., 1/4"-20 UNC or 5/16"-24 UNF):
-
1/4"or5/16": The nominal major diameter in inches (1/4 inch = 0.250", 5/16 inch = 0.3125"). The actual measured diameter will be very slightly less. -
-20or-24: The Threads Per Inch (TPI) - the number of complete threads along one inch of length. -
UNCorUNF: The thread series.-
UNC: Unified National Coarse. The most common general-purpose thread. Stronger in shear, more tolerant of dirt/damage, easier to start. -
UNF: Unified National Fine. Used where higher tensile strength or finer adjustment is needed (e.g., engine components, precision instruments). More threads per inch on the same diameter.
-
-
(Other less common series exist, like UNEF - Extra Fine, or UNS - Special, but UNC/UNF dominate DIY).
-
Key Takeaway: Both the diameter number and the pitch/TPI number are essential to uniquely identify a thread. An M8 bolt is NOT the same as a 5/16" bolt. A 1/4"-20 bolt is NOT the same as a 1/4"-28 bolt.
9. Beyond Size & Pitch: Thread Type (UNC, UNF, Metric Fine, etc.)
We touched on UNC and UNF above. While size (diameter + pitch) is king, the thread profile and angle are also standardized within a system. The good news is that for identification purposes using the methods above (especially the Thread Checker or Pitch Gauge), you're inherently confirming the thread type fits the standard profile.
-
Common Thread Types Encountered:
-
Metric ISO (M): 60-degree thread angle. Coarse is standard; Fine is specified (e.g., M8x1.0).
-
Unified National Coarse (UNC): 60-degree thread angle. General purpose.
-
Unified National Fine (UNF): 60-degree thread angle. Higher strength/finer adjustment.
-
NPT/NPTF: Tapered pipe threads for sealing. Do not try to match these with standard UNC/UNF or Metric nuts/bolts! They require specific identification tools/methods.
-
-
Why the Thread Checker Wins Here: It physically tests fitment. If your bolt screws smoothly into the hole marked "1/4"-20 UNC", you know it conforms to the UNC profile. If it doesn't fit "1/4"-28 UNF", you know it's not that. It handles the type identification seamlessly.
10. Pro Tips & Common Pitfalls to Avoid 🛑
-
Clean the Threads First! Dirt, rust, paint, or grease can hide threads, clog gauge teeth, or prevent a bolt from threading smoothly into a checker. A wire brush is your friend.
-
Measure in the Middle: Avoid measuring the first thread or two at the very start or end of the bolt/nut. These areas are often slightly deformed from starting threads or chamfers. Measure the "good" threads in the middle.
-
Check for Damage: Look closely! Are threads nicked, flattened, or distorted? Damaged threads won't measure accurately or fit properly in a gauge/checker. You might need to find an undamaged section or a different fastener.
-
Metric vs. Imperial Confusion: This is the #1 mistake! M6 (6mm ~0.236") is NOT 1/4" (0.250"). M8 (8mm ~0.315") is NOT 5/16" (0.3125") - they are VERY close but NOT interchangeable! Forcing them causes damage. Know which system you're likely dealing with (e.g., older US equipment often Imperial, newer/most global is Metric). When in doubt, measure carefully or use a thread checker.
-
Coarse vs. Fine Confusion (Imperial): A 1/4"-20 bolt (Coarse) will NOT fit a 1/4"-28 nut (Fine), even though the diameter is the same. The pitch is different. The thread checker instantly shows this.
-
Assuming "Standard": Never assume "it must be coarse thread" or "it must be metric." Always verify. Manufacturers use what's appropriate for the application.
-
Bolt Head Markings: While sometimes indicating grade (strength) or manufacturer, they rarely indicate the thread size directly. Don't rely on them for sizing identification.
-
When in Doubt, Use the Thread Checker! Seriously, it eliminates so many potential errors inherent in measurement methods, especially for those less familiar with threads. It's confidence in a pocket-sized tool.
11. Conclusion: Choose Your Method, Conquer Your Project! 🏆
Determining thread size doesn't need to be a frustrating puzzle. You have the tools and knowledge now!
-
For maximum precision and understanding, the Caliper + Pitch Gauge method is solid, though it takes practice.
-
For sheer speed, simplicity, and foolproof accuracy, especially when dealing with a pile of unknown fasteners, the Nut & Bolt Thread Checker is an absolute game-changer for DIYers. It's the difference between minutes of frustration and seconds of certainty. (Hint: Our HomeDIYer Thread Checker is designed specifically to make this effortless for you!)
-
Avoid the Ruler/Eyeball method unless absolutely desperate.
Investing a few minutes (or seconds!) in correctly identifying your threads saves hours of frustration, prevents costly damage, and ensures your projects are safe, strong, and successful. No more stripped threads, no more wobbly joints, no more wasted trips to the hardware store for the wrong size. Grab your calipers, your pitch gauge, or better yet, your thread checker, and take control of your fasteners!
Ready to make thread identification instant and effortless? Check out the ultimate DIYer's tool: The HomeDIYer Nut & Bolt Thread Checker (Standard & Metric). Stop guessing, start building!
12. FAQs: Your Thread Sizing Questions Answered ❓
-
Q: Can I use a metric nut on an imperial bolt (or vice versa) if they seem close?
-
A: ABSOLUTELY NOT! Even if the diameter looks similar (like M6 vs 1/4"), the thread angle and pitch are different. Forcing them will cross-thread and destroy both parts. Always use matching thread systems.
-
-
Q: My bolt fits loosely in the "correct" hole on the thread checker. What's wrong?
-
A: The threads could be worn or damaged. Clean them thoroughly and try again. If still loose, try the next smaller size hole. If it doesn't fit any well, it might be a damaged or non-standard thread.
-
-
Q: How do I measure the thread size of a screw?
-
A: The methods are identical! Screws have threads just like bolts. Use the same techniques – calipers/pitch gauge or thread checker (look for the small screw holes/posts on a good checker).
-
-
Q: What does "M10" mean? Is it coarse or fine?
-
A: "M10" refers to a metric thread with a nominal 10mm diameter. By itself, it implies the standard coarse pitch for that size. For M10, the coarse pitch is 1.5mm. If it were fine pitch, it would be explicitly written (e.g., M10 x 1.25 or M10 x 1.0).
-
-
Q: What's the difference between thread pitch and TPI?
-
A: They are inverses describing the same thing - thread spacing.
-
Pitch (Metric): The distance between adjacent thread peaks (in millimeters).
-
TPI (Imperial): The number of thread peaks within one inch of length.
-
A smaller pitch number means threads are closer together (finer thread). A higher TPI number also means threads are closer together (finer thread). E.g., M8x1.25 (coarse) vs. M8x1.0 (finer); 1/4"-20 UNC (coarse) vs. 1/4"-28 UNF (finer).
-
-
-
Q: Does the HomeDIYer Thread Checker include pipe threads (NPT)?
-
A: Standard thread checkers like ours focus on the most common straight mechanical threads (Metric Coarse/Fine, UNC, UNF). Pipe threads (NPT/NPTF) are tapered and require a different type of gauge specifically designed for pipe threads. Always check the specifications of a thread checker before purchasing if you need pipe thread identification.
-
Got more questions? Drop them in the comments below! We're always happy to help fellow DIYers master their projects. Let's get building!


Comments
Leave a comment