
Cabinet Door Installation Jig โ€“ Aluminum Alloy Dowel Drilling Guide with 6/8/10mm Drill Bits

Save 21%
No reviews

Title: Upgrade the cabinet door auxiliary red + 3 drill bits
Price:
Sale price$36.50 USD Regular price$46.00 USD
Stock:
In stock (812 units), ready to be shipped

Payment & Security

Ach Direct Debit Amazon American Express Apple Pay Bancontact BLIK Diners Club Discover EPS Google Pay iDEAL Wero JCB Maestro Mastercard Multibanco MobilePay PayPal Przelewy24 Shop Pay Twint Union Pay USDC Visa

Your payment information is processed securely. We do not store credit card details nor have access to your credit card information.

Limited Offer โ€” Spend More, Save More
Spend $55+
Save $5
Spend $100+
Save $10
Spend $200+
Save $25
HomeDIYer DIY Expert Support

DIY Expert Support

Get fitment advice & recommendations

Monโ€“Fri  8:30 AM โ€“ 8:00 PM
24-Hour Fast Ship
Arrives in 3โ€“14 Days
Worldwide Shipping
30-Day Returns
1 tree planted with every purchase

Description

Align, Drill & Install Cabinet Doors with Confidence ๐Ÿ› ๏ธ

Getting cabinet door hinges, dowels, and hardware positioned perfectly is one of those jobs where even a few millimeters off means the door wonโ€™t hang straight. This cabinet door installation jig takes the guesswork out of the process with a solid aluminum alloy body, a built-in dual-scale ruler (metric and imperial), and an adjustable clamping system that holds the jig securely in place on your panel edge while you drill. Whether youโ€™re building new cabinetry or replacing hardware on an existing wardrobe, this jig helps you drill accurate, repeatable holes every time.

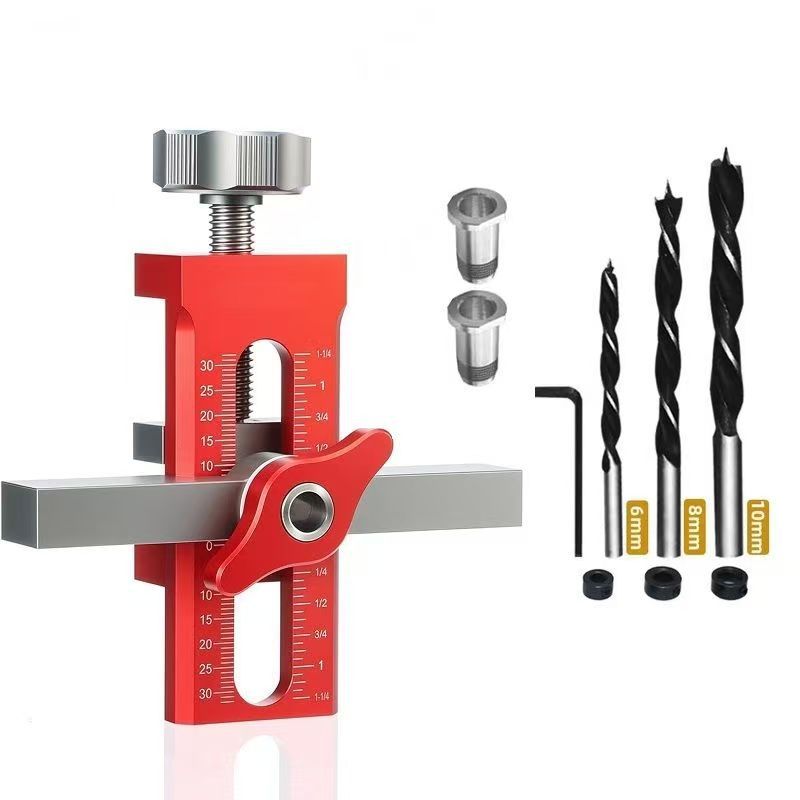
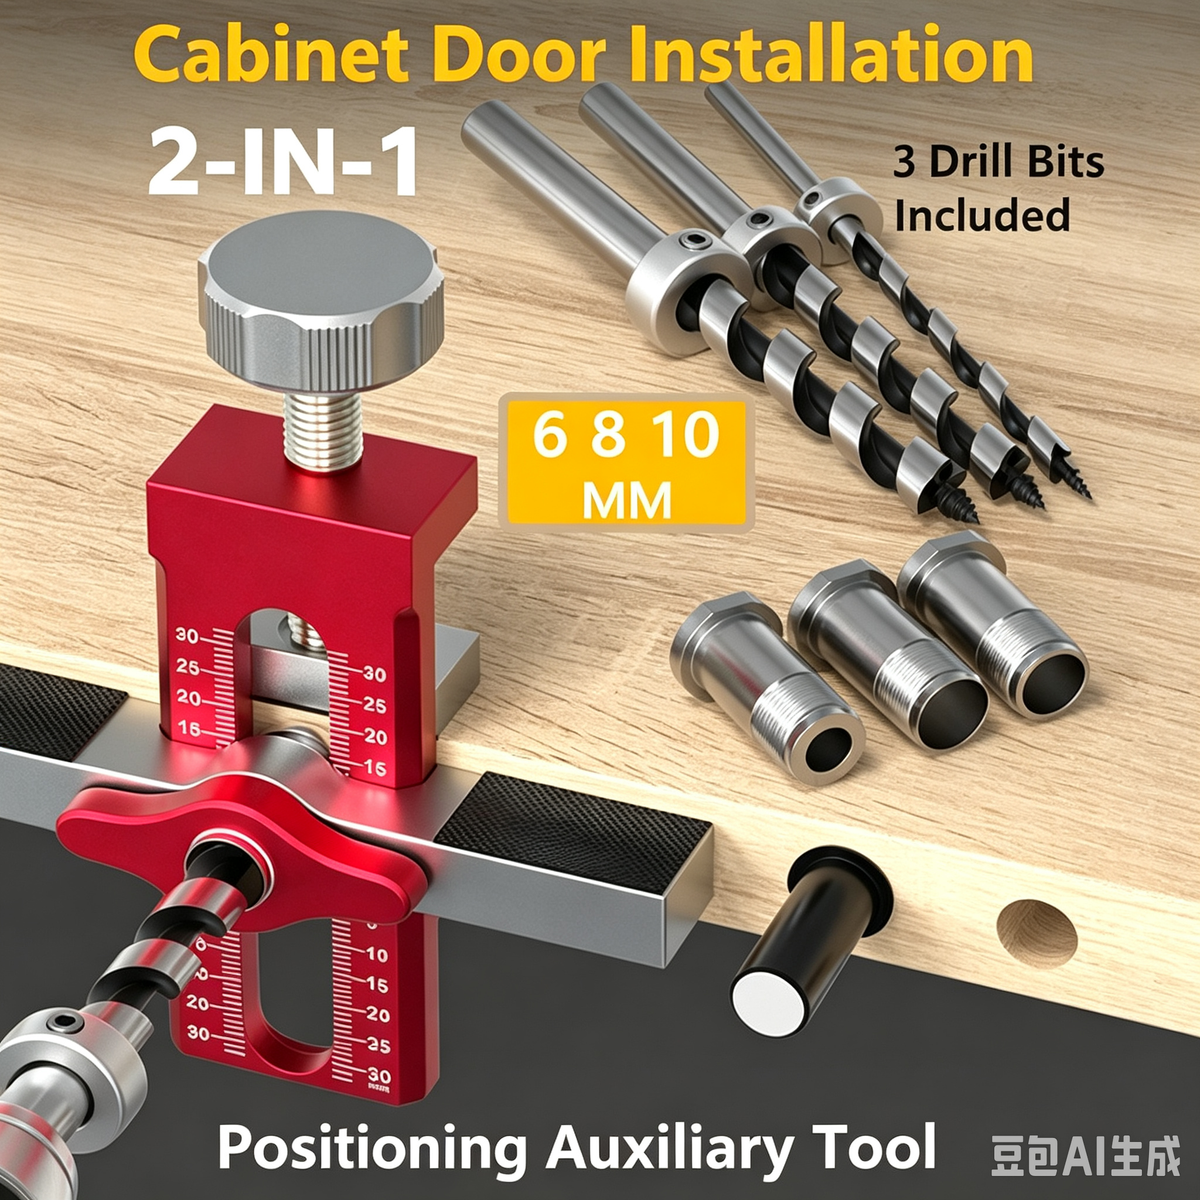
The kit includes two steel drill bushings (to guide 6mm, 8mm, or 10mm bits precisely), three matching twist drill bits, depth-stop collars, and an L-shaped hex key โ€” everything you need to install cabinet doors, align shelf pins, drill dowel joints, or position hinge cup holes on a wide range of wood panel thicknesses. A practical, no-fuss woodworking jig for DIYers and home improvement enthusiasts who want professional results without the setup hassle. ๐Ÿ 

Key Features & Benefits

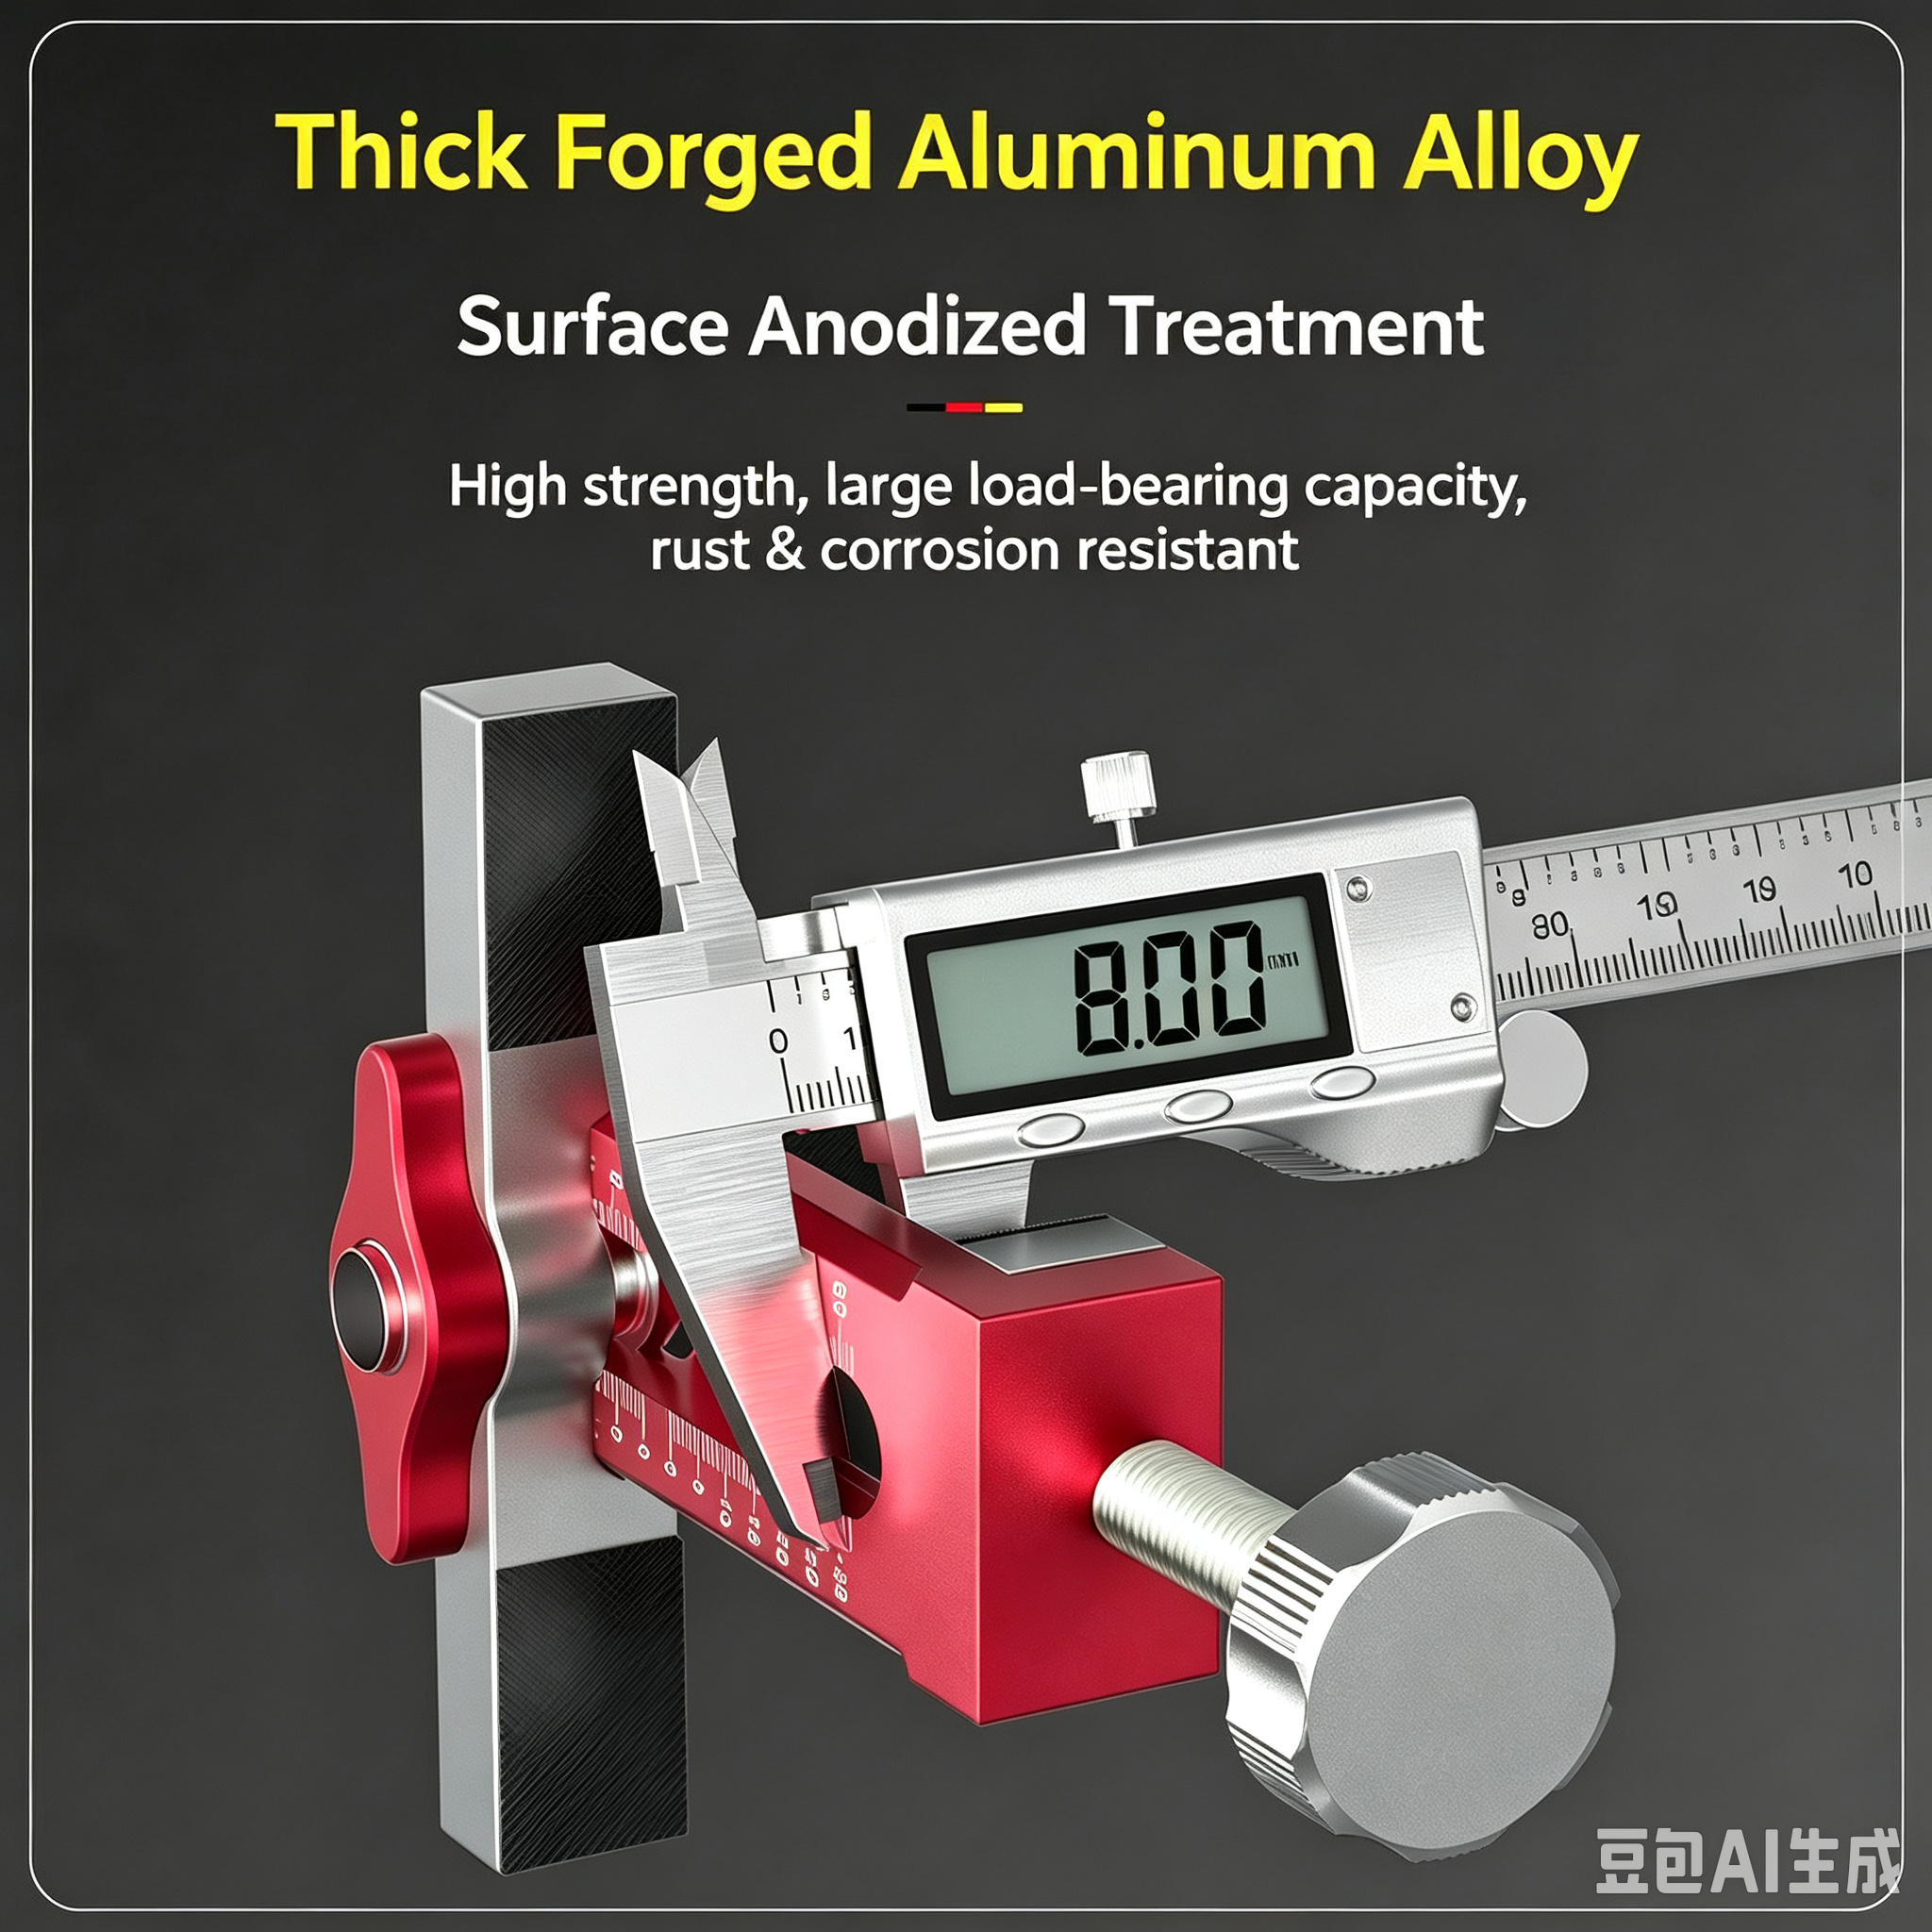
  • โœ”๏ธ Upgraded Aluminum Alloy Body โ€“ Lightweight yet rigid, the anodized aluminum frame resists flex under drilling pressure, keeping your holes aligned even when working through hard or dense wood panels.
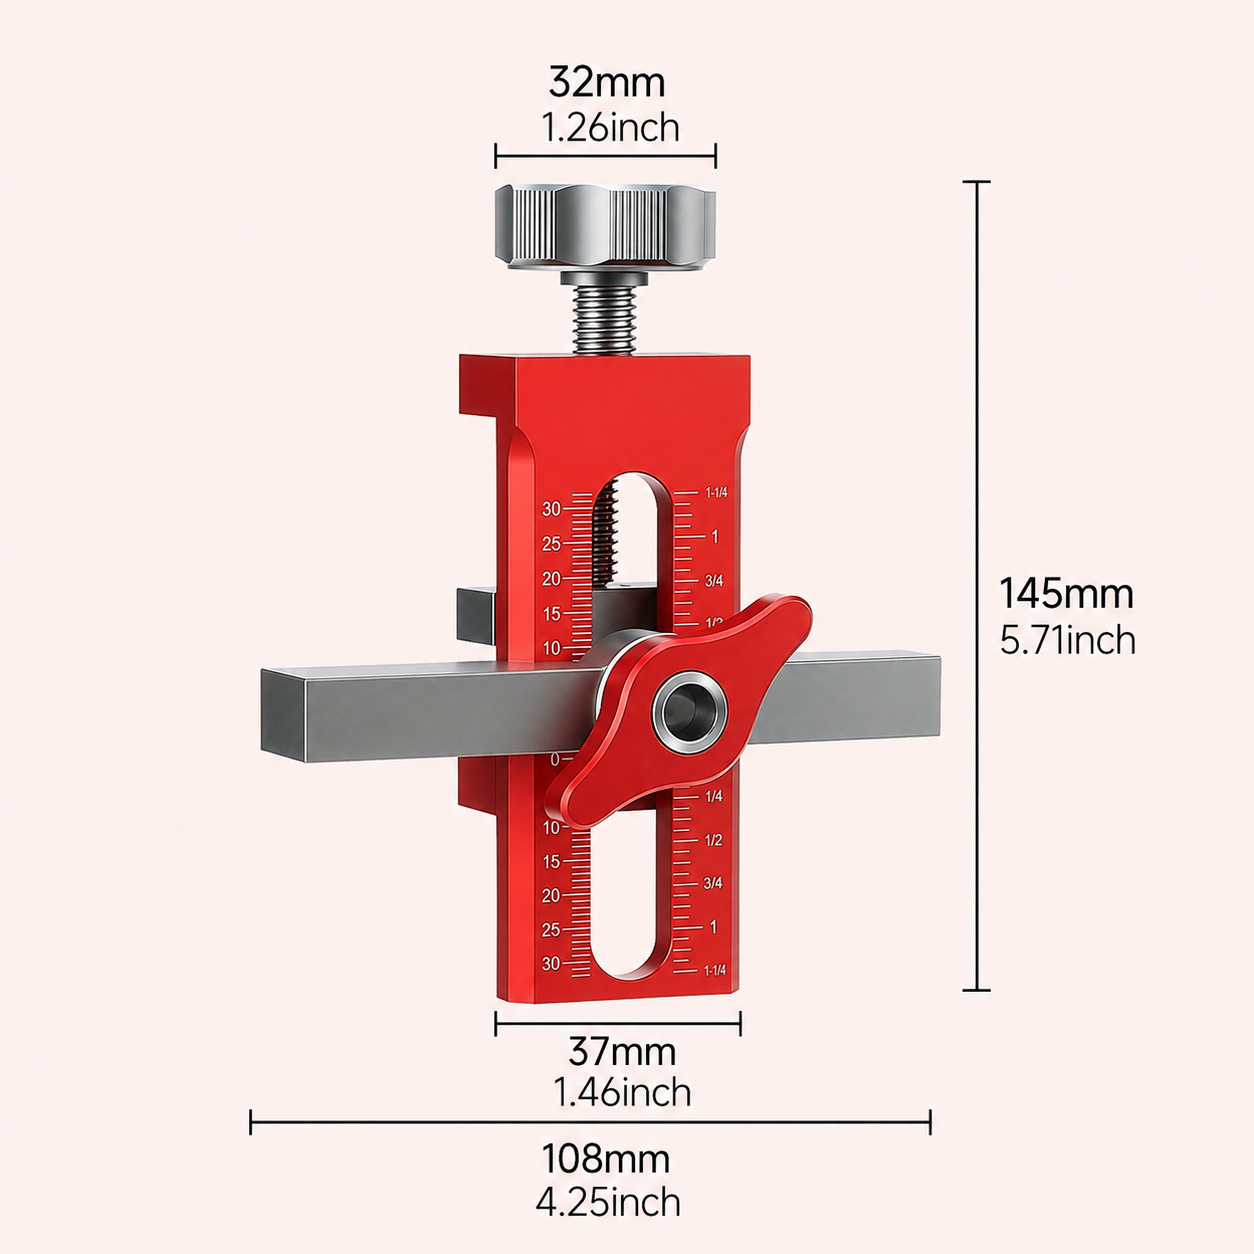
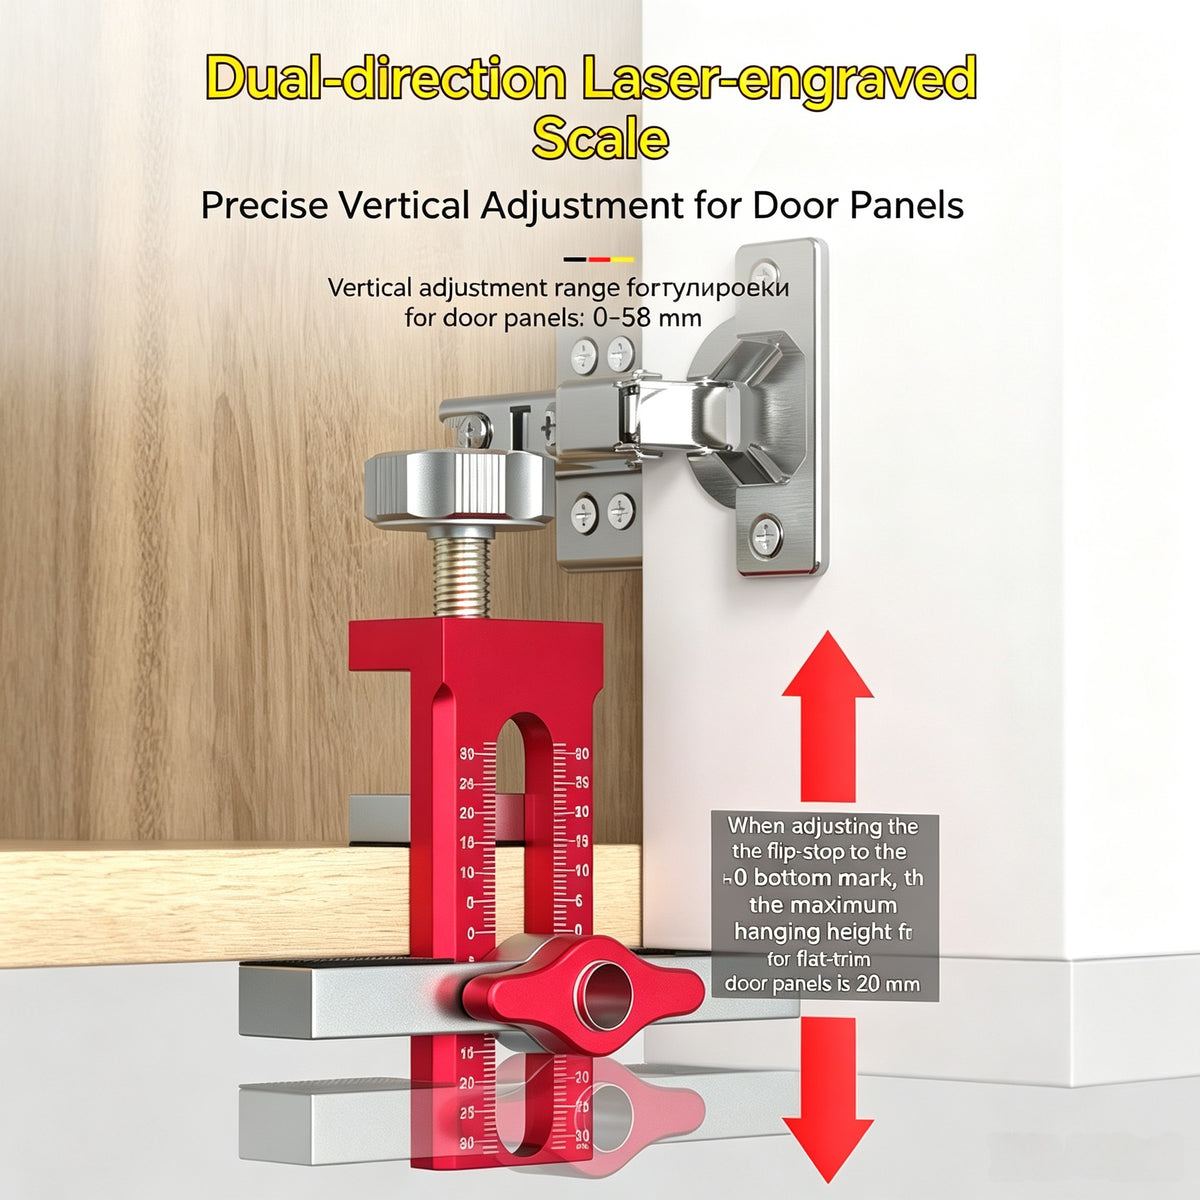
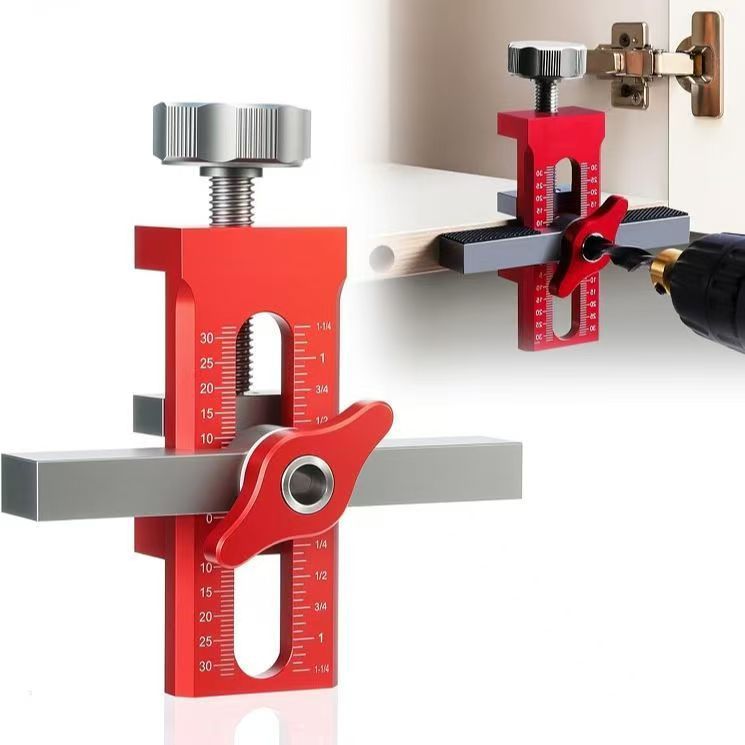
  • โœ”๏ธ Dual-Scale Built-In Ruler (mm & inch) โ€“ The integrated ruler runs up to 30mm / 1ยผโ€ on both sides of center, letting you set precise offsets for hinge cup positions, shelf pins, or dowel centers without reaching for a separate tape measure.
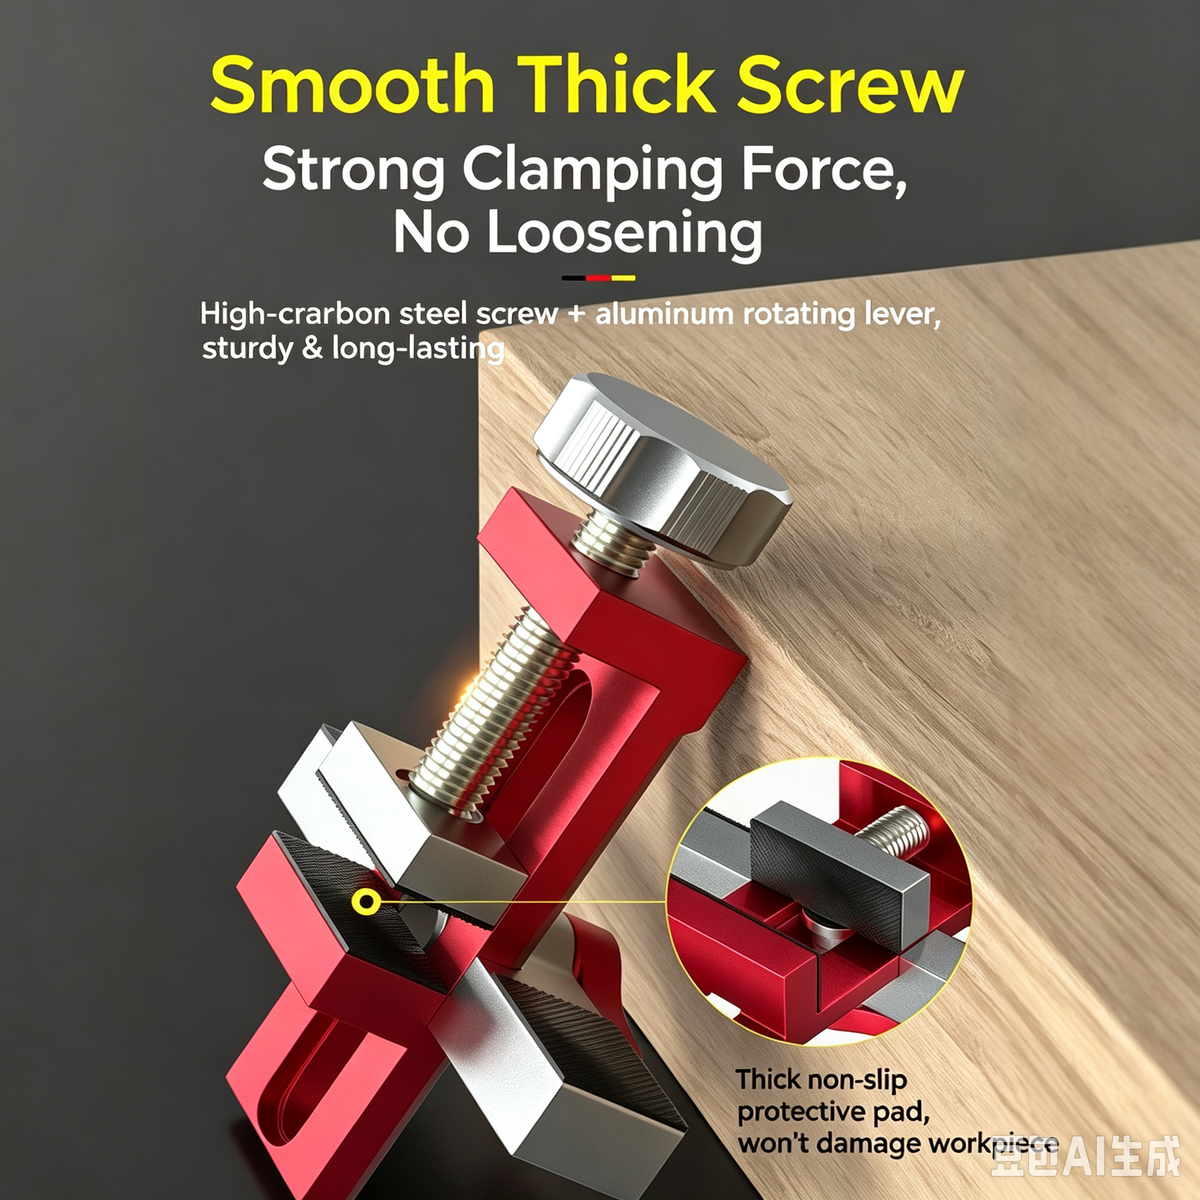
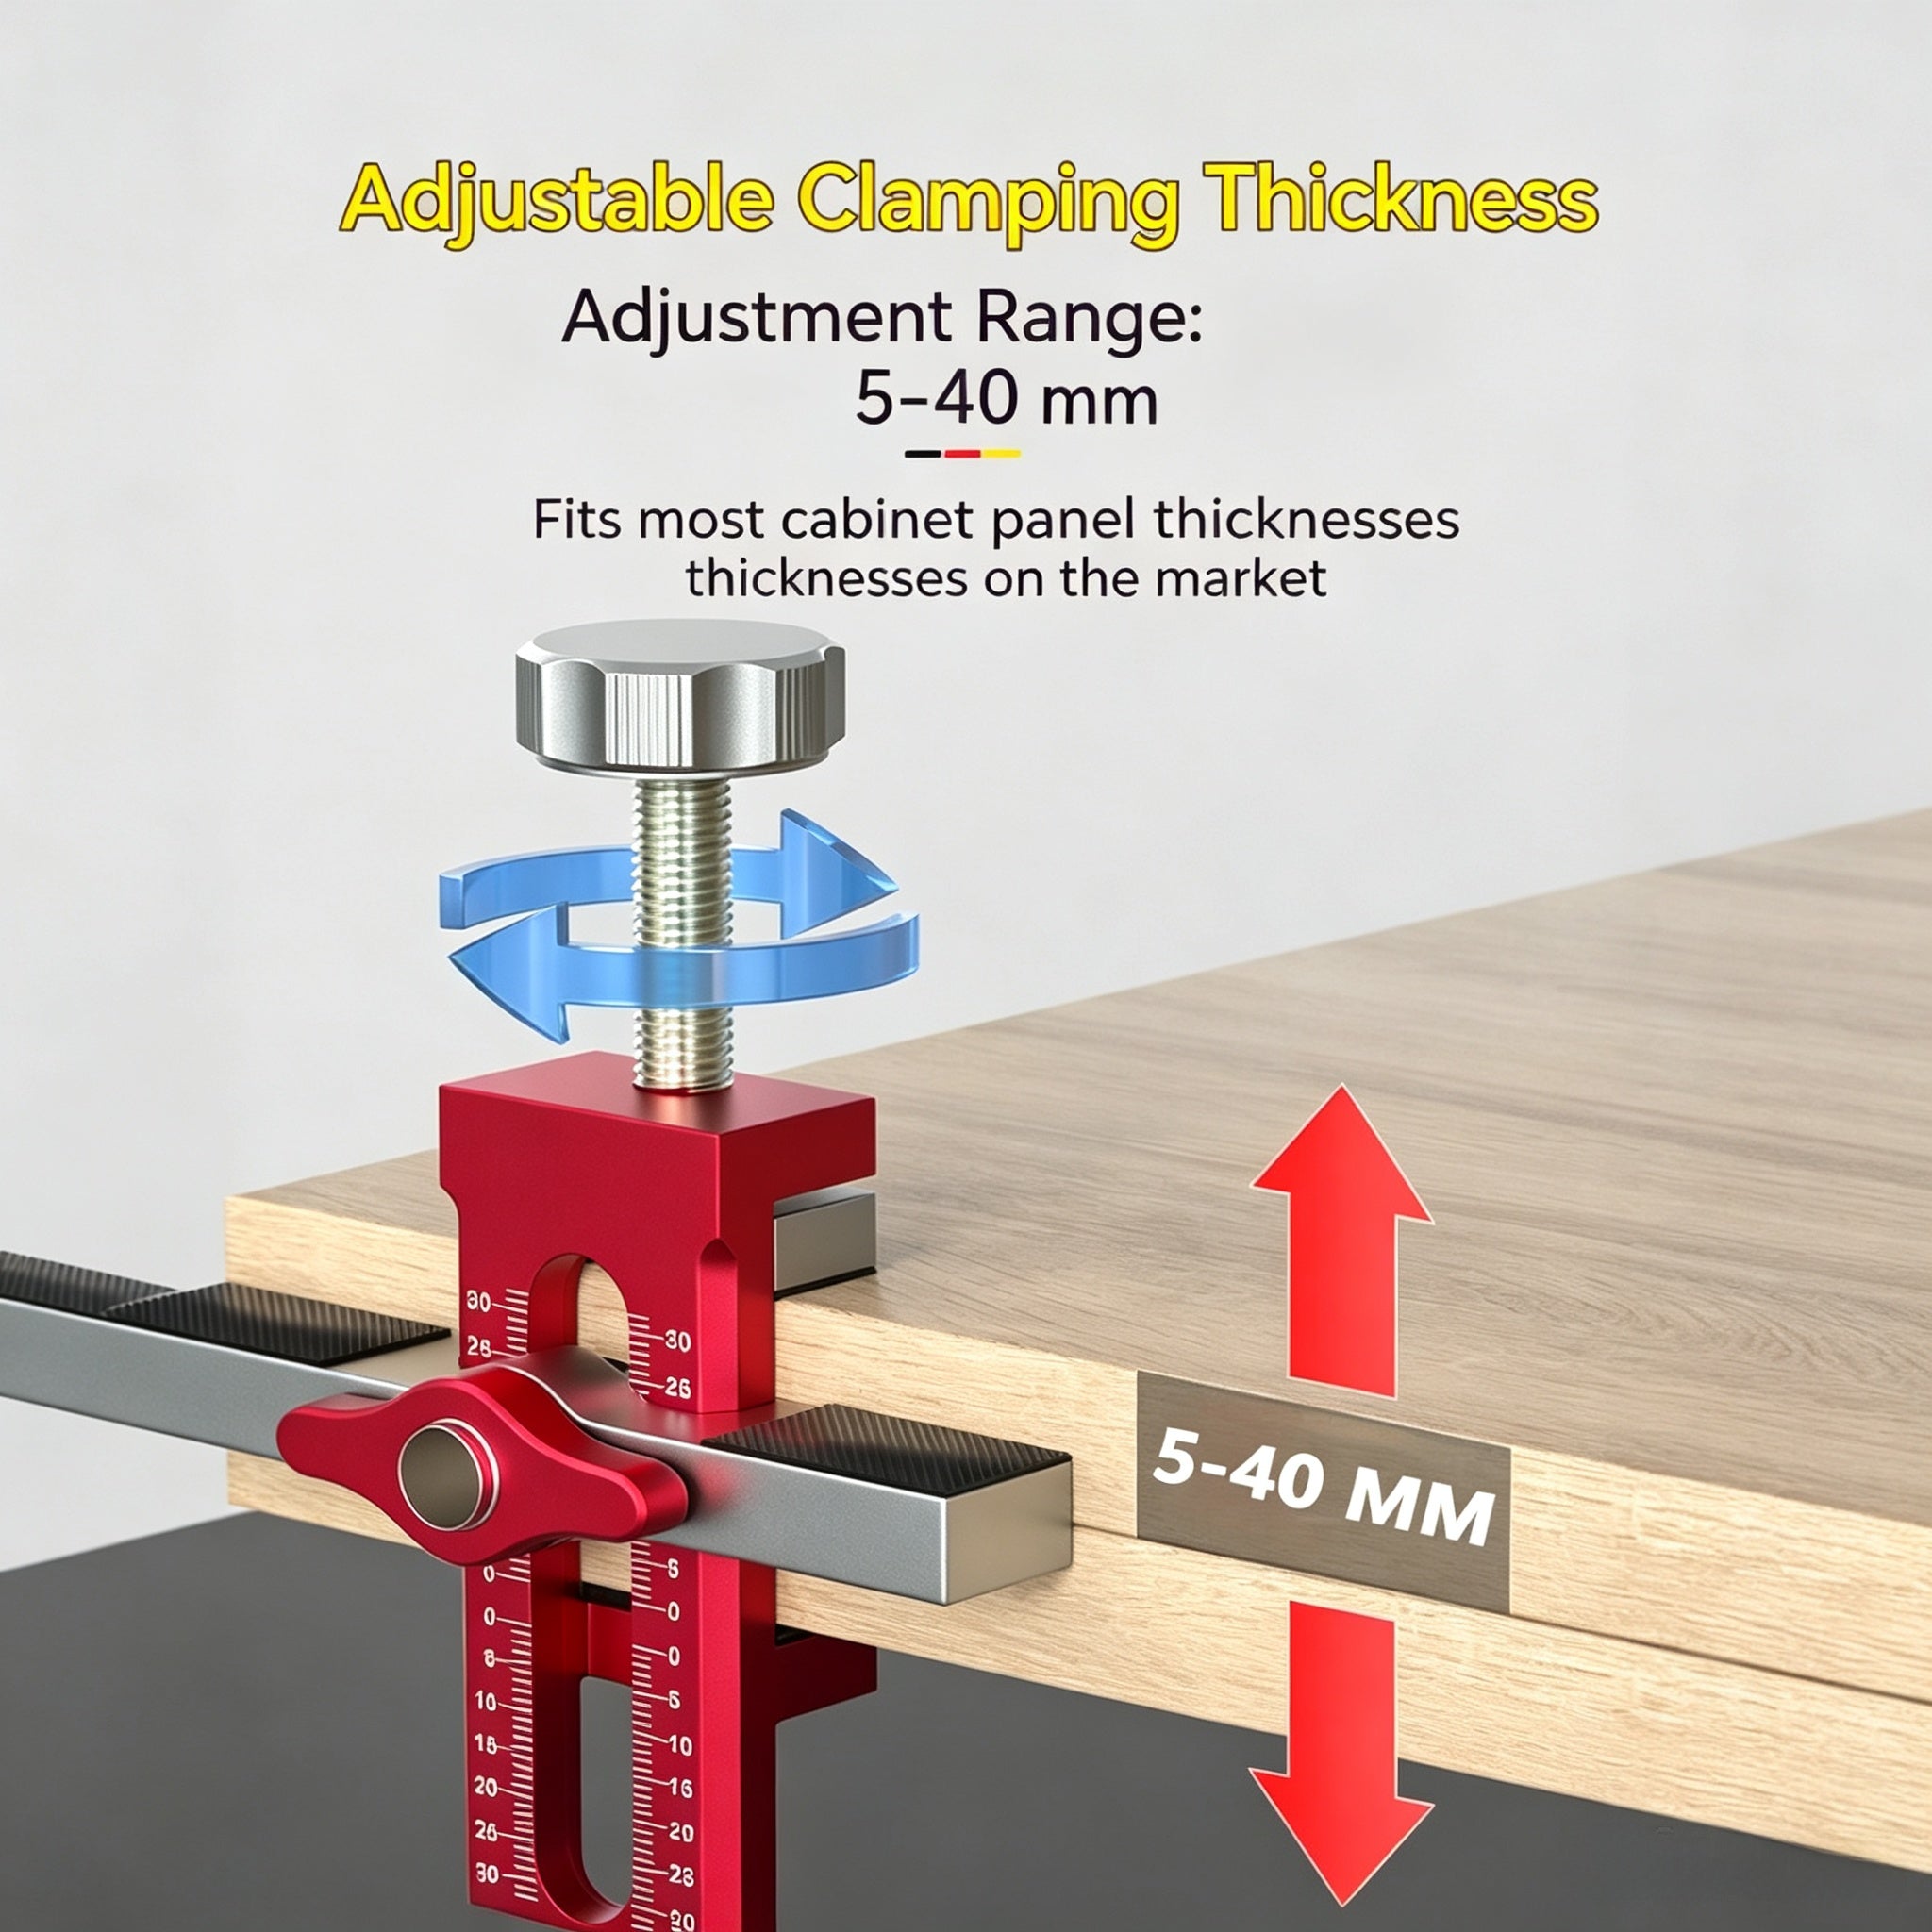
  • โœ”๏ธ Adjustable Butterfly Clamp โ€“ The wing-nut locking mechanism clamps firmly onto panel edges from thin door stiles to thick cabinet sides, keeping the jig perfectly square while you drill.
  • โœ”๏ธ 2ร— Steel Drill Bushings Included โ€“ Hardened steel bushings guide your drill bit at a true 90ยฐ angle into the workpiece, eliminating drift and ensuring clean, perpendicular holes every time.
  • โœ”๏ธ 3ร— Drill Bits (6mm, 8mm, 10mm) โ€“ Three commonly used woodworking bit sizes are included, covering standard dowel diameters, shelf pin holes, and European hinge cup prep work right out of the box.
  • โœ”๏ธ Depth-Stop Collars & Hex Key Included โ€“ Set consistent drill depths on each bit using the included stop collars, so you donโ€™t drill through your panel face. The L-key tightens the collars securely.
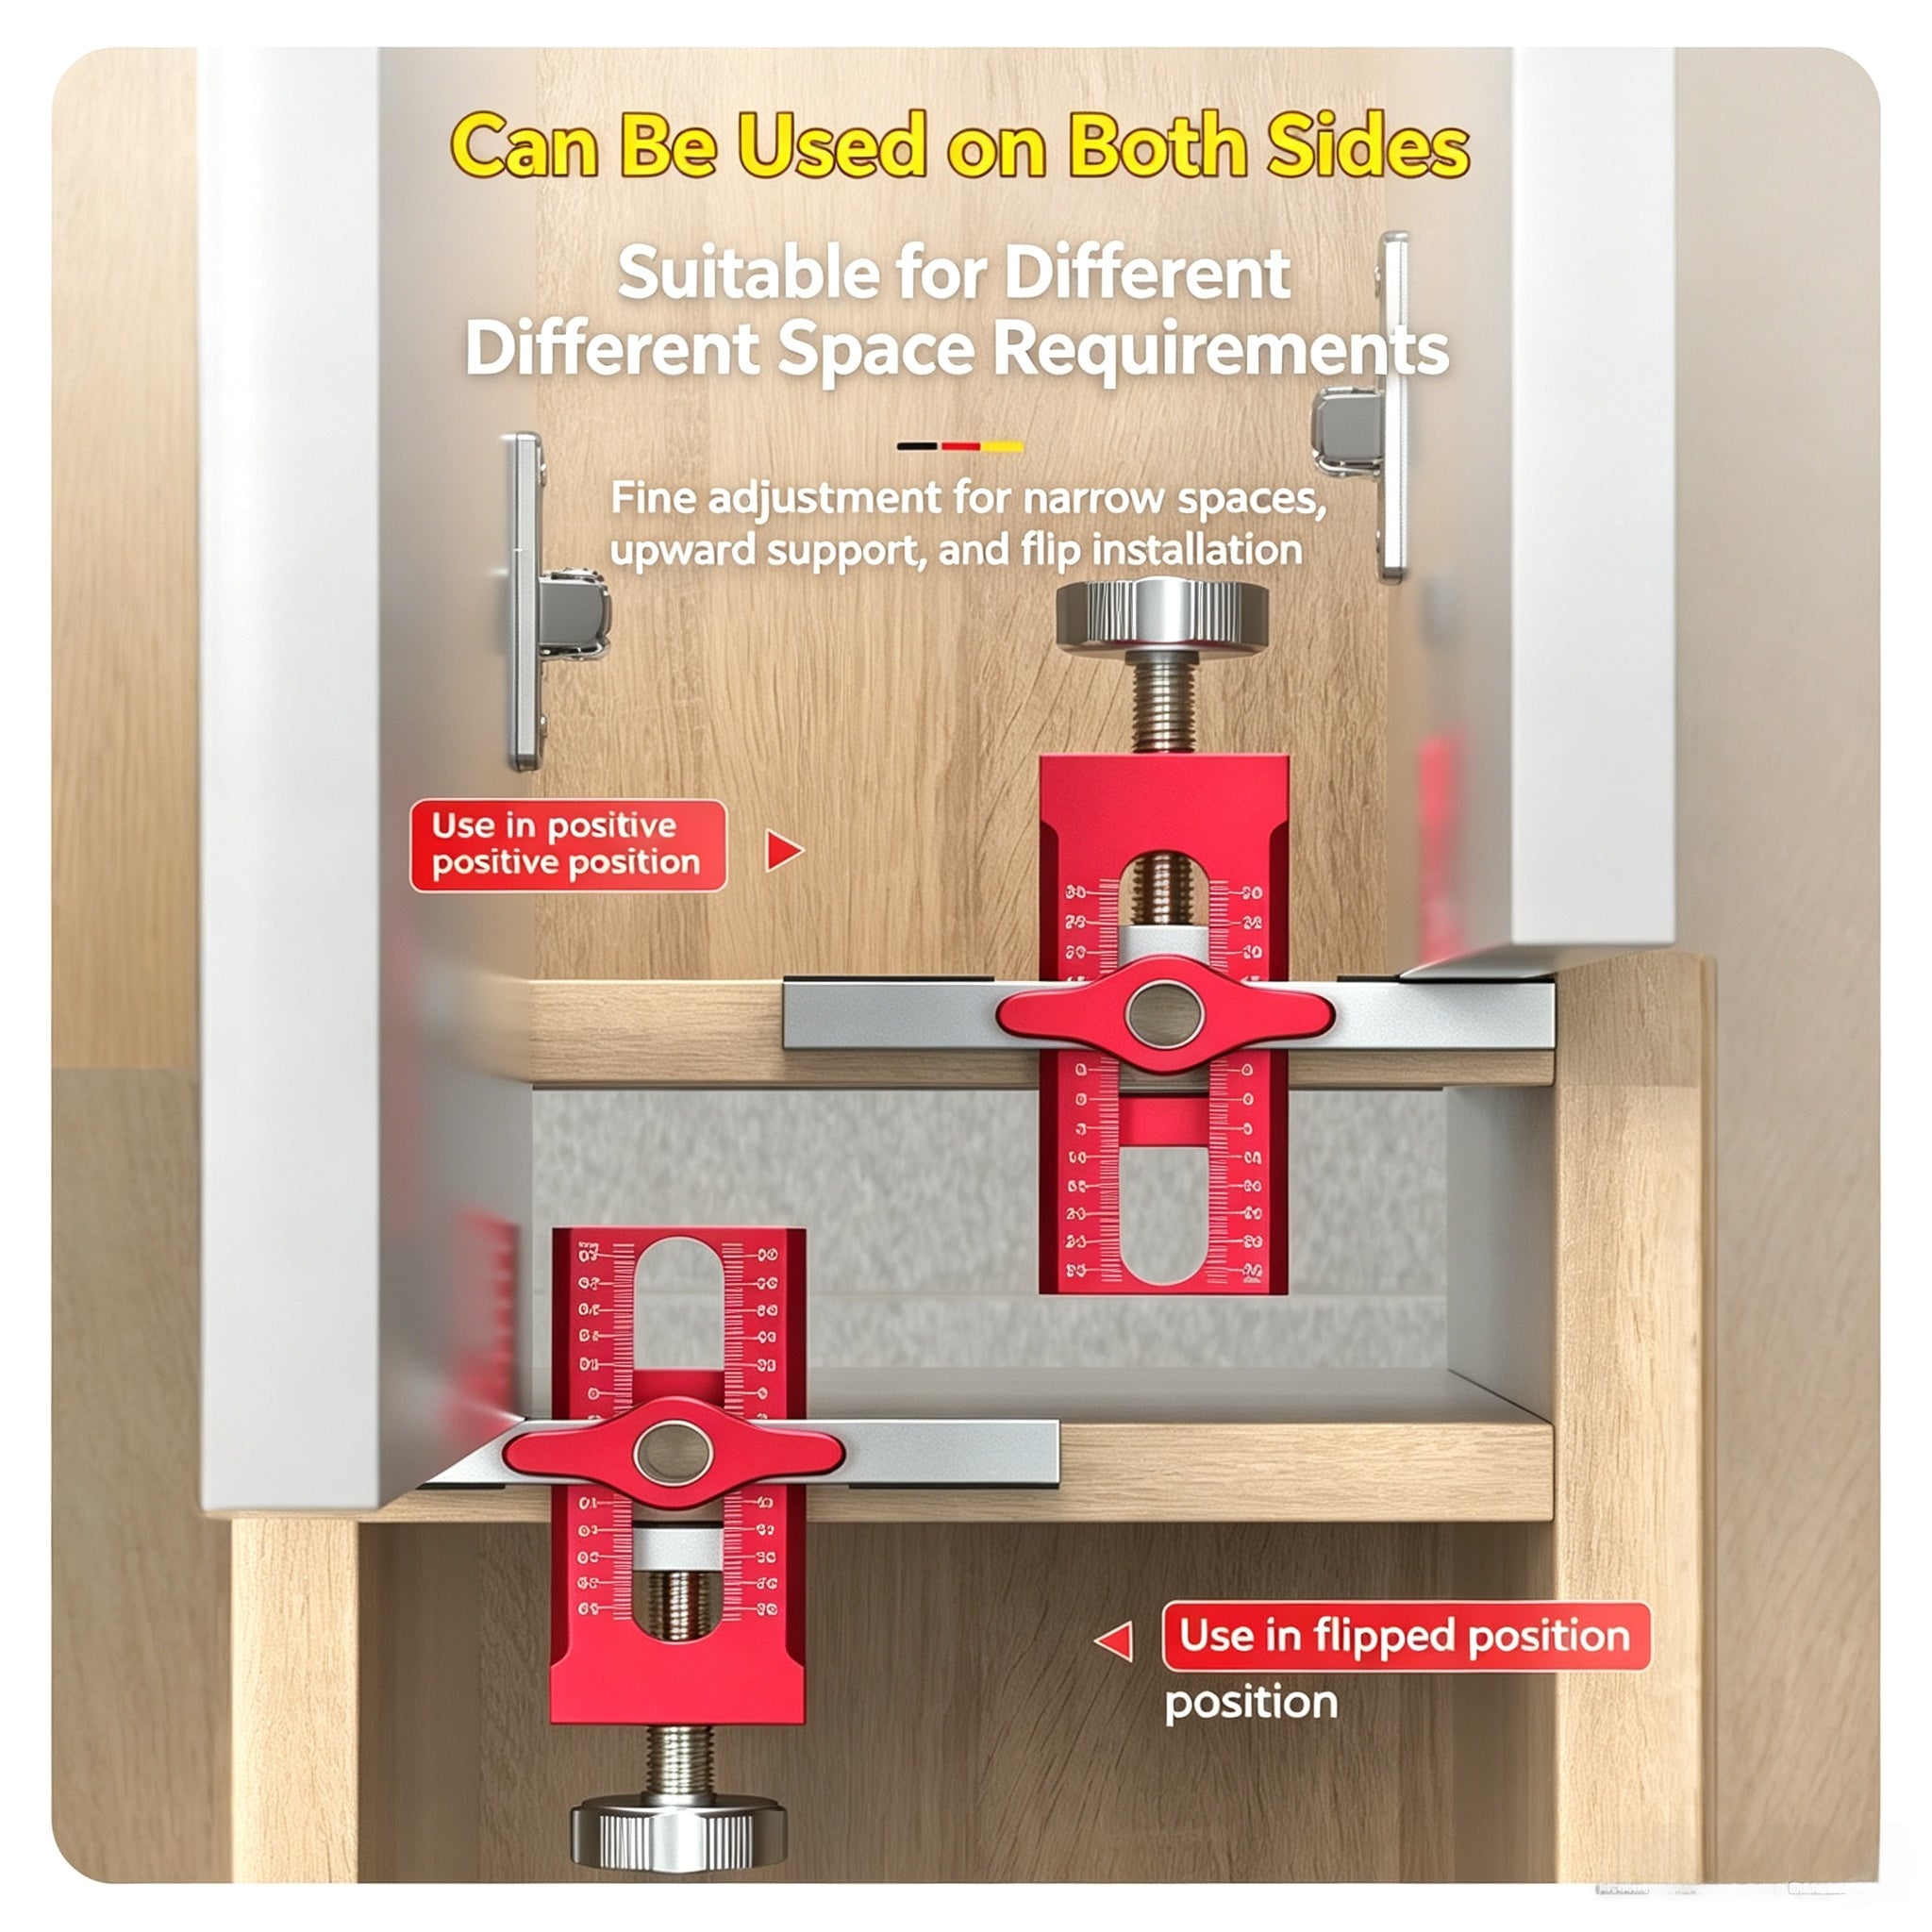
  • โœ”๏ธ Works on Both Faces & Edges โ€“ The symmetric jig body allows positioning on either the panel face or the edge, making it versatile for face-frame cabinets, frameless Euro-style cabinets, and furniture dowel joints.

Ideal For These Woodworking & Cabinet Projects ๐Ÿ 

  • Cabinet Door Hinge Installation
  • Wardrobe Door Alignment
  • Shelf Pin Hole Drilling
  • Furniture Dowel Joint Assembly
  • European-Style Hinge Cup Boring
  • Cabinet Carcass Assembly
  • Kitchen Cabinet Door Hanging
  • Closet Organizer Installation
  • TV Cabinet & Media Unit Assembly
  • DIY Furniture Building & Repair

Compatibility Guide

Compatible With

  • โœ”๏ธ Solid Wood Panels (hardwood & softwood)
  • โœ”๏ธ Plywood & Engineered Wood
  • โœ”๏ธ MDF & Particleboard
  • โœ”๏ธ Melamine-Coated Board
  • โœ”๏ธ Panel thicknesses from approx. 12mm to 40mm+
  • โœ”๏ธ Standard corded & cordless drills

Not Recommended For

  • โœ˜ Metal or masonry drilling
  • โœ˜ Panels under 10mm thick (insufficient clamping depth)
  • โœ˜ Angled or compound-miter drilling applications

Product Specifications

Specification Details
Jig Body Material Aluminum Alloy (anodized)
Color Red
Ruler Scale Dual โ€” Metric (mm) & Imperial (inch), ยฑ30mm / ยฑ1ยผโ€ from center
Clamp Type Adjustable butterfly (wing-nut) clamp with sliding rail
Drill Bushings 2ร— hardened steel bushings
Drill Bits Included 3ร— twist drill bits โ€” 6mm, 8mm, 10mm
Depth Stop Collars 3ร— included (one per bit)
Hex Key 1ร— L-shaped hex wrench
Package Contents 1ร— Jig body, 2ร— bushings, 3ร— drill bits, 3ร— stop collars, 1ร— hex key

How to Use This Cabinet Door Drilling Jig

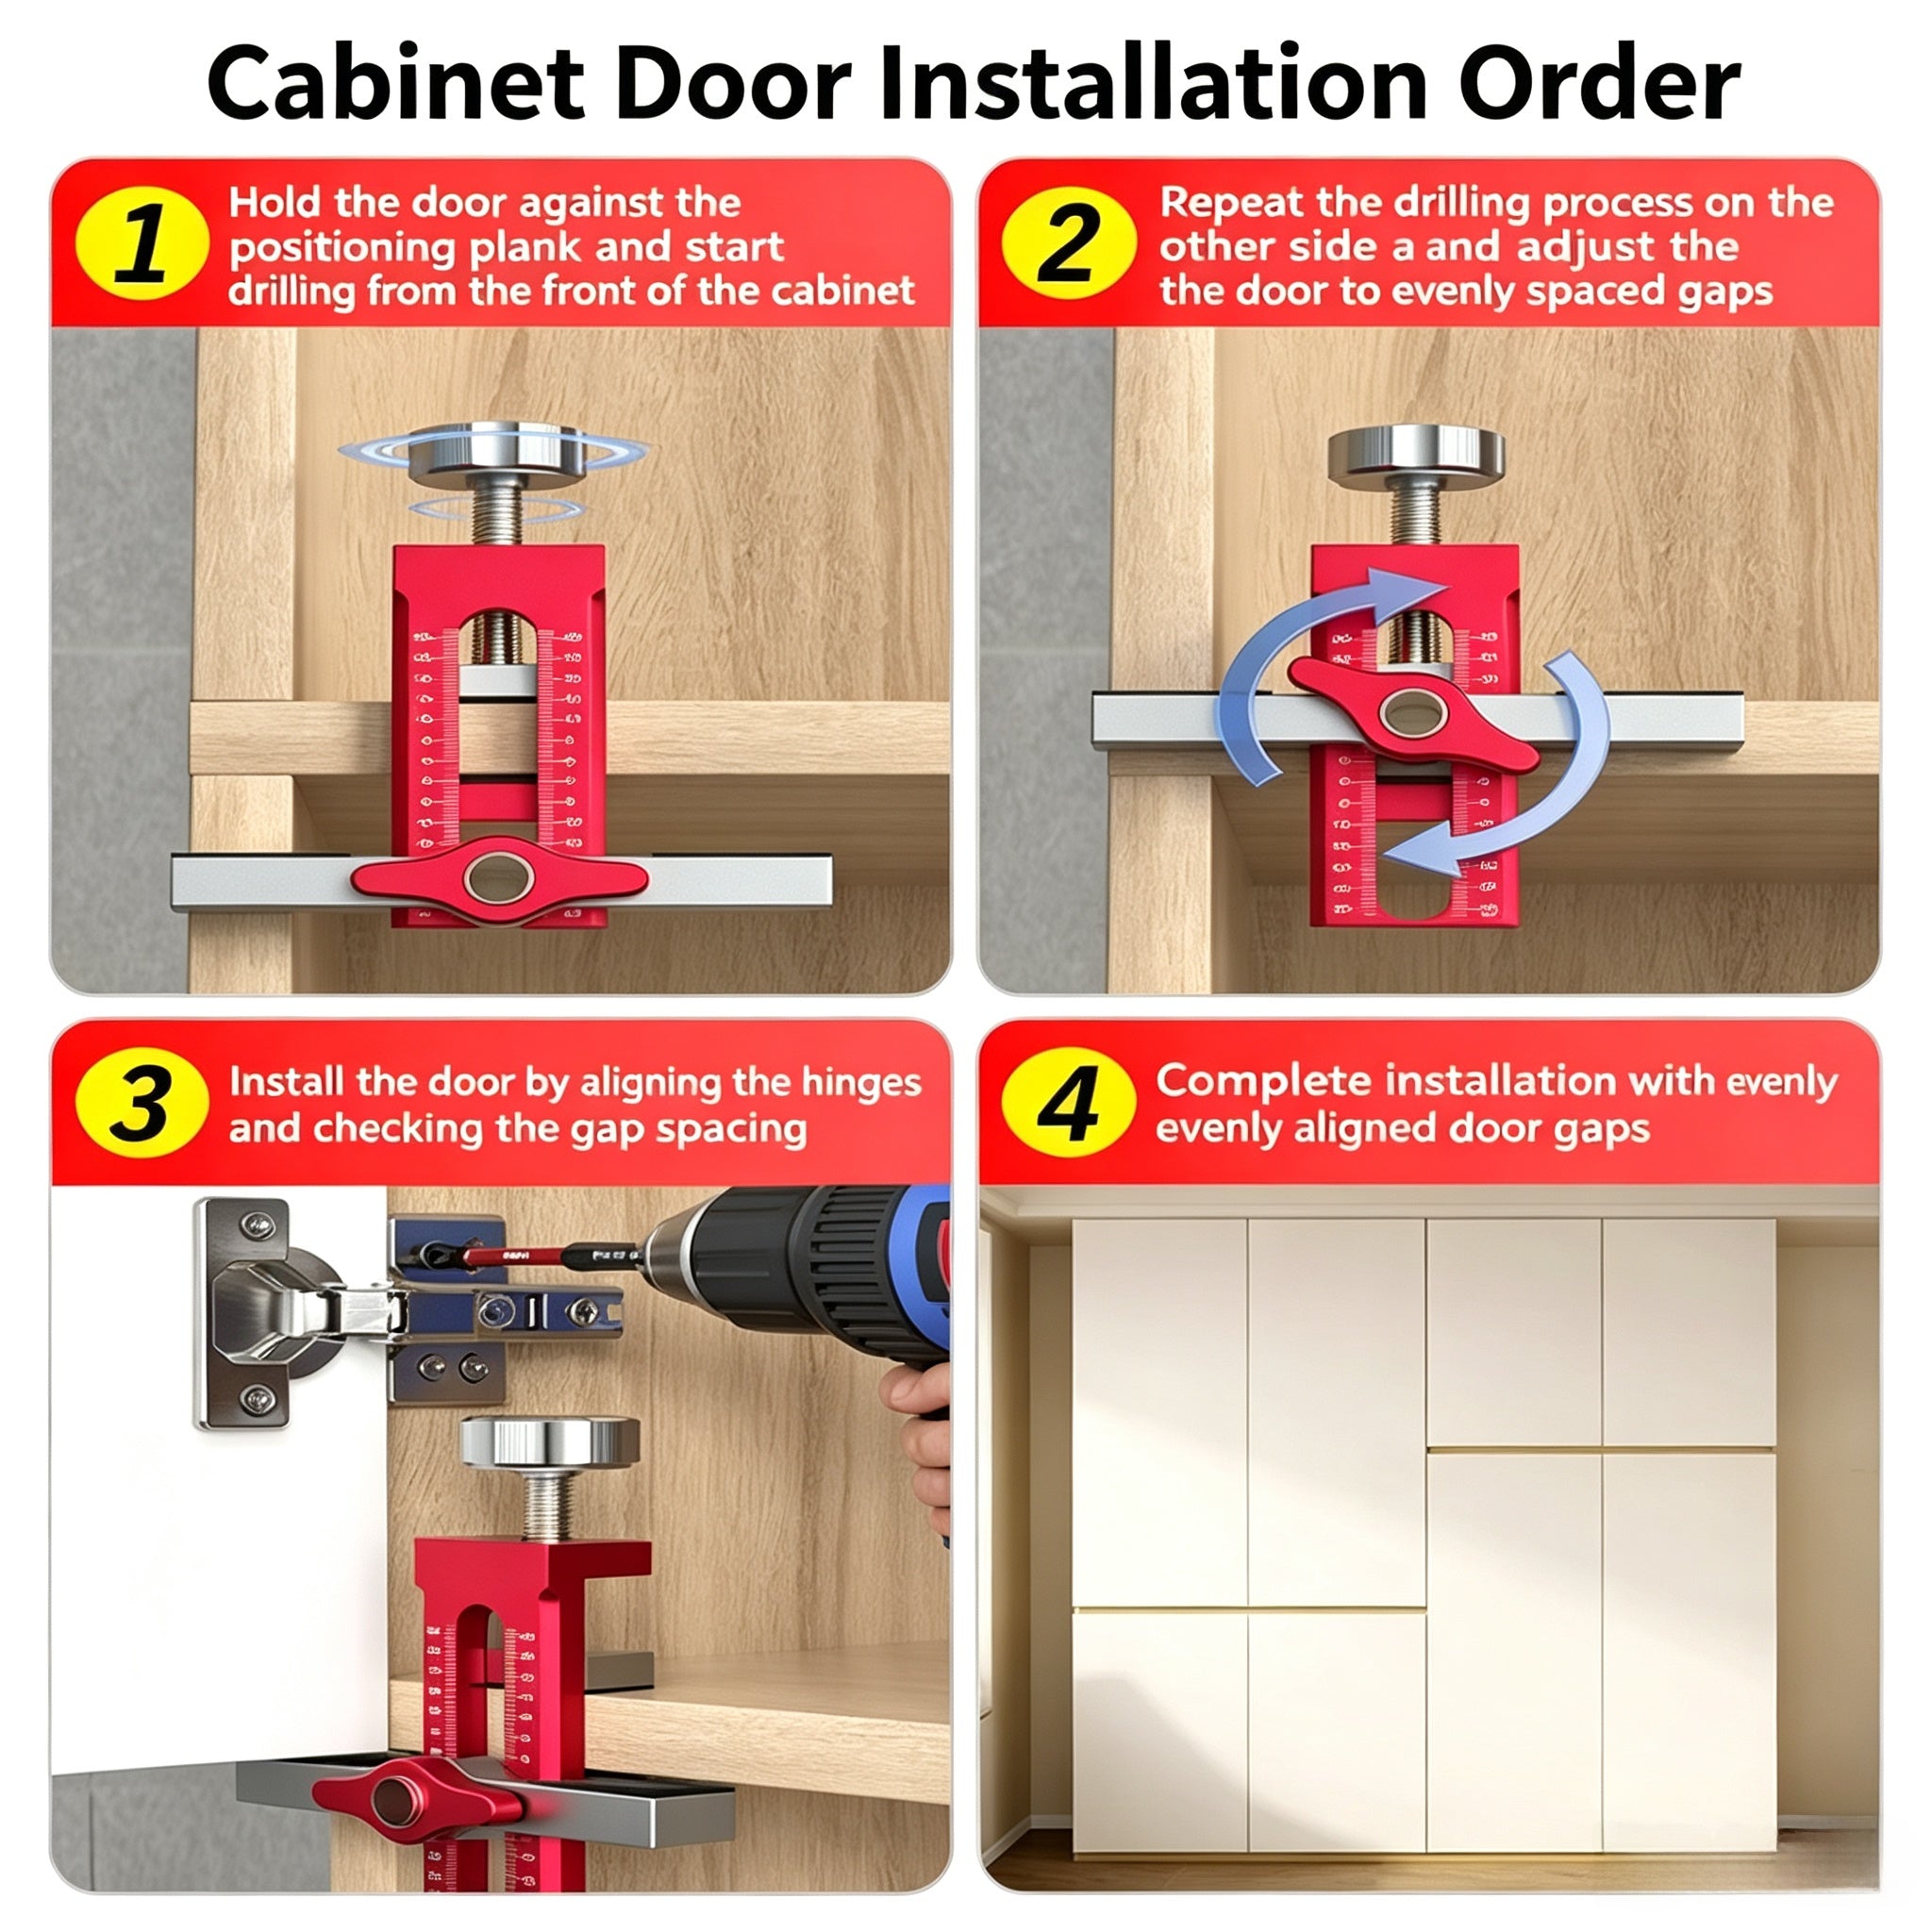
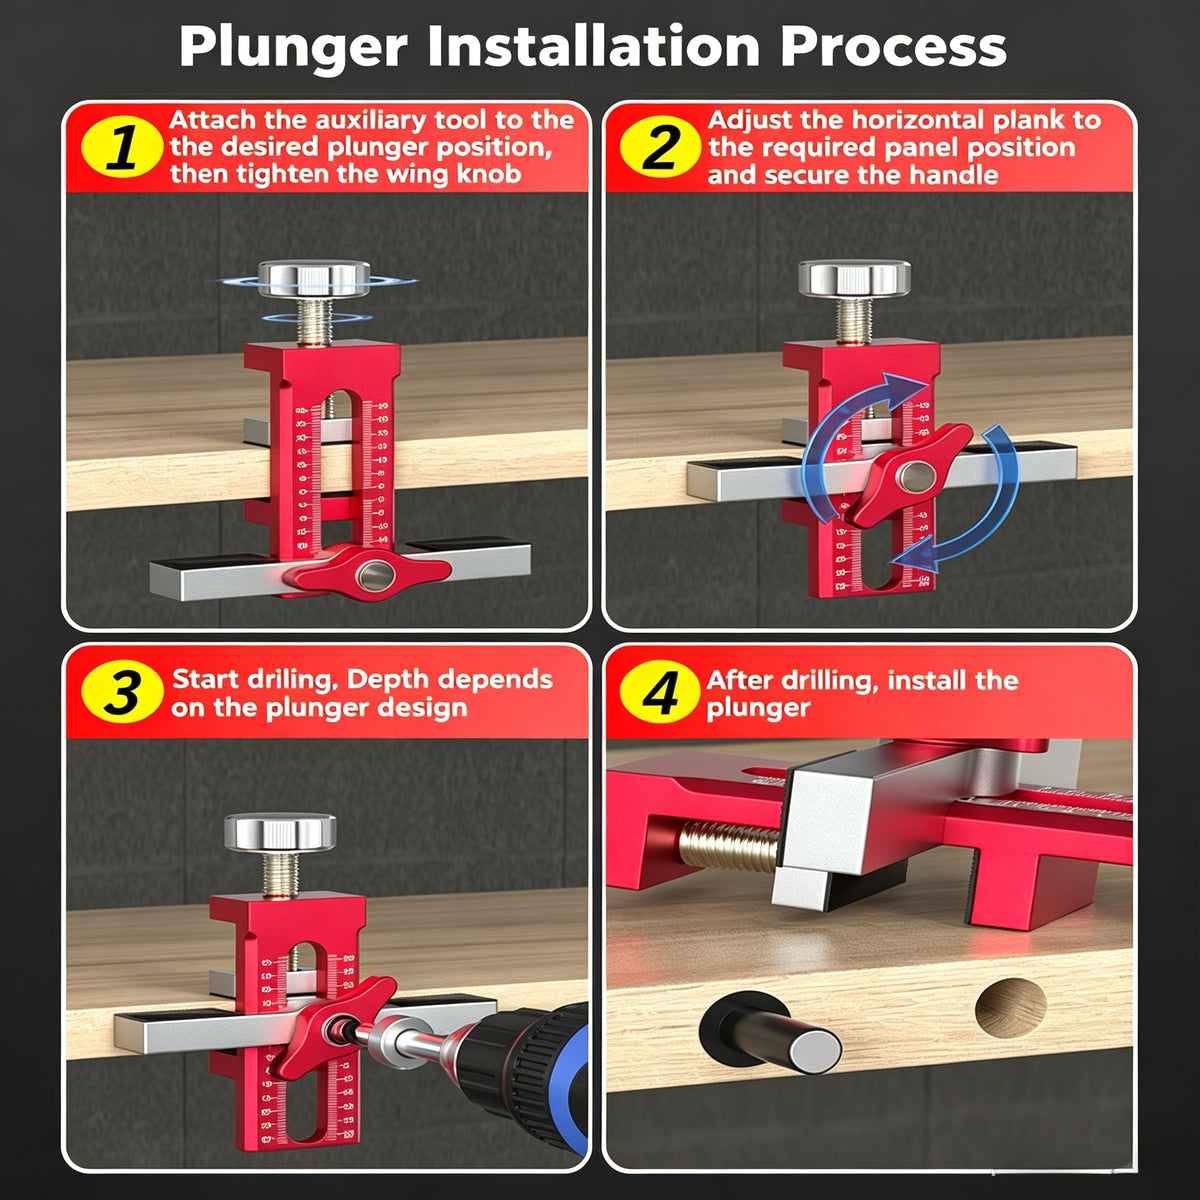
  1. Select your drill bit and bushing โ€” Choose the drill bit size that matches your dowel, shelf pin, or hinge cup diameter (6mm, 8mm, or 10mm). Insert the matching bushing into the jigโ€™s guide hole.
  2. Set the drill depth โ€” Slide the depth-stop collar onto your drill bit and tighten it with the included hex key. Set depth to match your dowel length or hinge cup spec โ€” typically 25โ€“30mm for standard dowels.
  3. Position the jig on your panel โ€” Use the built-in ruler to measure and set the offset from the panel edge to the hole center. Align the jig to your mark.
  4. Clamp the jig securely โ€” Tighten the butterfly clamp onto the panel edge until the jig is firm and flush. It should not shift when moderate side pressure is applied.
  5. Drill your hole โ€” Insert your drill into the bushing guide and drill at a steady, moderate speed. The bushing keeps the bit perpendicular and prevents drift. Stop when the collar contacts the bushing.
  6. Repeat for additional holes โ€” Reposition and re-clamp the jig for each hole, using the ruler to maintain consistent spacing across all drilling locations.

Frequently Asked Questions

What panel thickness range does this jig work with?

The adjustable clamp accommodates a wide range of panel thicknesses, typically from about 12mm up to 40mm or more. For very thin panels (under 12mm), the clamp may not grip securely, so this jig works best on standard cabinet and furniture panels.

Can this be used to drill European hinge cup holes (35mm)?

This jig is designed for dowel, shelf pin, and alignment drilling with 6mm, 8mm, and 10mm bits. For 35mm European hinge cup holes, you would need a dedicated 35mm Forstner bit and a separate hinge boring jig. This jig is ideal for positioning the 5mm or 8mm pilot holes used alongside hinge cups.

Is this jig suitable for beginners?

Yes. The clamping system, built-in ruler, and drill bushings simplify what is otherwise a freehand task. If you can operate a standard drill, this jig gives you the accuracy and repeatability of a professional setup without needing workshop machinery.

Does the ruler show both metric and imperial measurements?

Yes. The jig body has a dual-scale ruler marked in both millimeters and inches on the same face, running ยฑ30mm (ยฑ1ยผโ€) from the center zero point. This makes it easy to work from either system depending on your hardware specifications.

Will this work with any standard drill?

Yes โ€” the included 6mm, 8mm, and 10mm twist drill bits fit standard drill chucks. The jig itself is compatible with any handheld corded or cordless drill with a standard keyless or keyed chuck.

How do I keep the holes consistent when drilling multiple cabinet doors?

Set your offset measurement on the jig ruler once, tighten the clamp, and use the same depth-stop collar setting for every door. This ensures every hinge or dowel hole is in exactly the same position relative to the panel edge โ€” which is what keeps all your doors hanging level.

Can I use this jig on MDF or particleboard panels?

Yes. MDF and particleboard are among the most common cabinet materials, and this jig works well on both. Use a sharp bit and moderate drill speed to avoid tear-out on the surface face, especially on melamine-coated board.

Why DIYers & Cabinet Builders Choose This Jig

  • ๐Ÿ  Repeatable Accuracy โ€” Once you set your measurement and depth, every hole is identical. No re-measuring between doors, no drift between panels.
  • ๐Ÿ”ฉ Aluminum Build That Holds Up โ€” Unlike plastic jigs that flex under pressure, the aluminum alloy body stays rigid, keeping your drill angle true even when working through dense hardwood.
  • ๐Ÿ“ Everything Included โ€” Jig, bushings, three drill bit sizes, stop collars, and hex key. No hunting for additional accessories before you can start drilling.
  • ๐Ÿ‘ DIY Friendly โ€” No workshop machinery required. Clamp it to your panel, drill your holes, and move on. The learning curve is minimal even for first-time cabinet installers.
  • ๐Ÿ† Metric & Imperial Ready โ€” The dual-scale ruler means you can work from hardware specs in either system โ€” useful when mixing European hardware with standard lumber dimensions.
๐Ÿ›’ Ready to build and install with precision? See current offers at checkout.

You may also like

Recently viewed





